

Using Rabby Wallet and Remix Ethereum to create a honeypot token
- 01
Installing Rabby Wallet
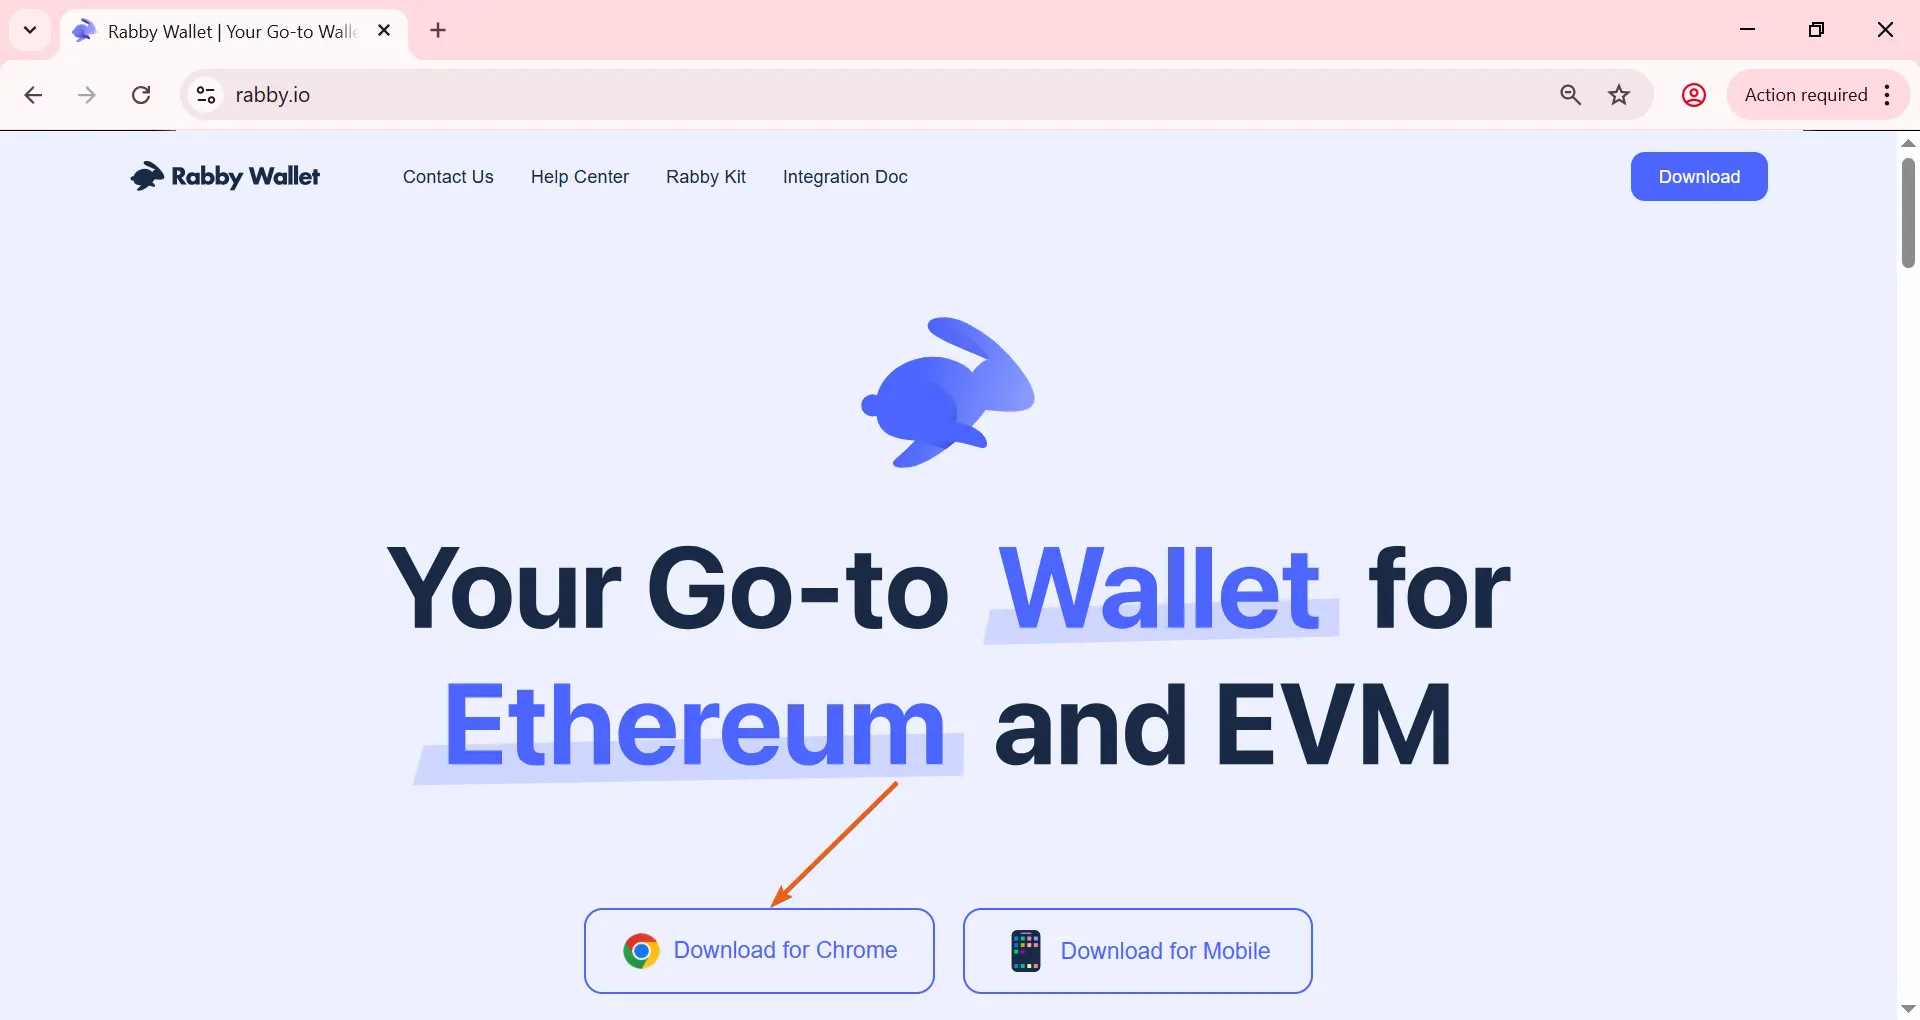
Install the Rabby Wallet extension.
Go to the official website rabby.io and select your browser.
- 02
Installing Rabby Wallet
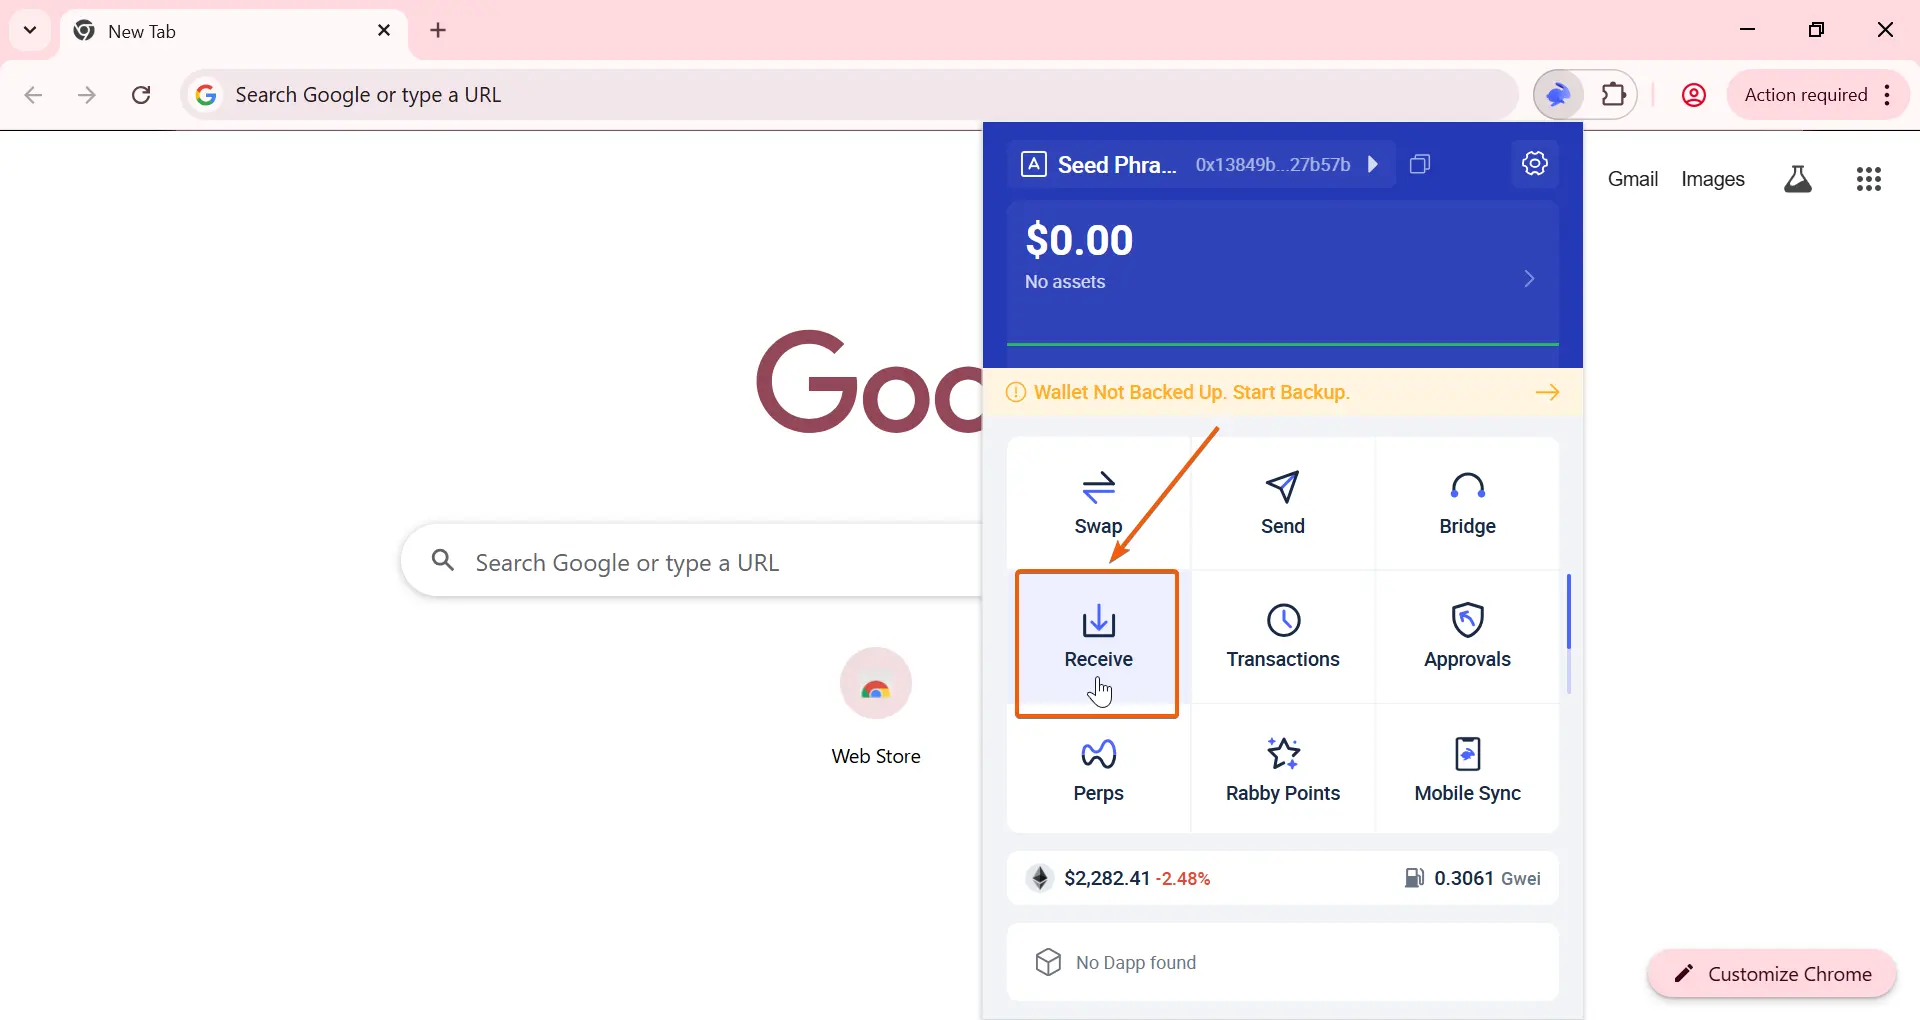
Open Rabby Wallet and click 'Receive'.
- 03
Installing Rabby Wallet
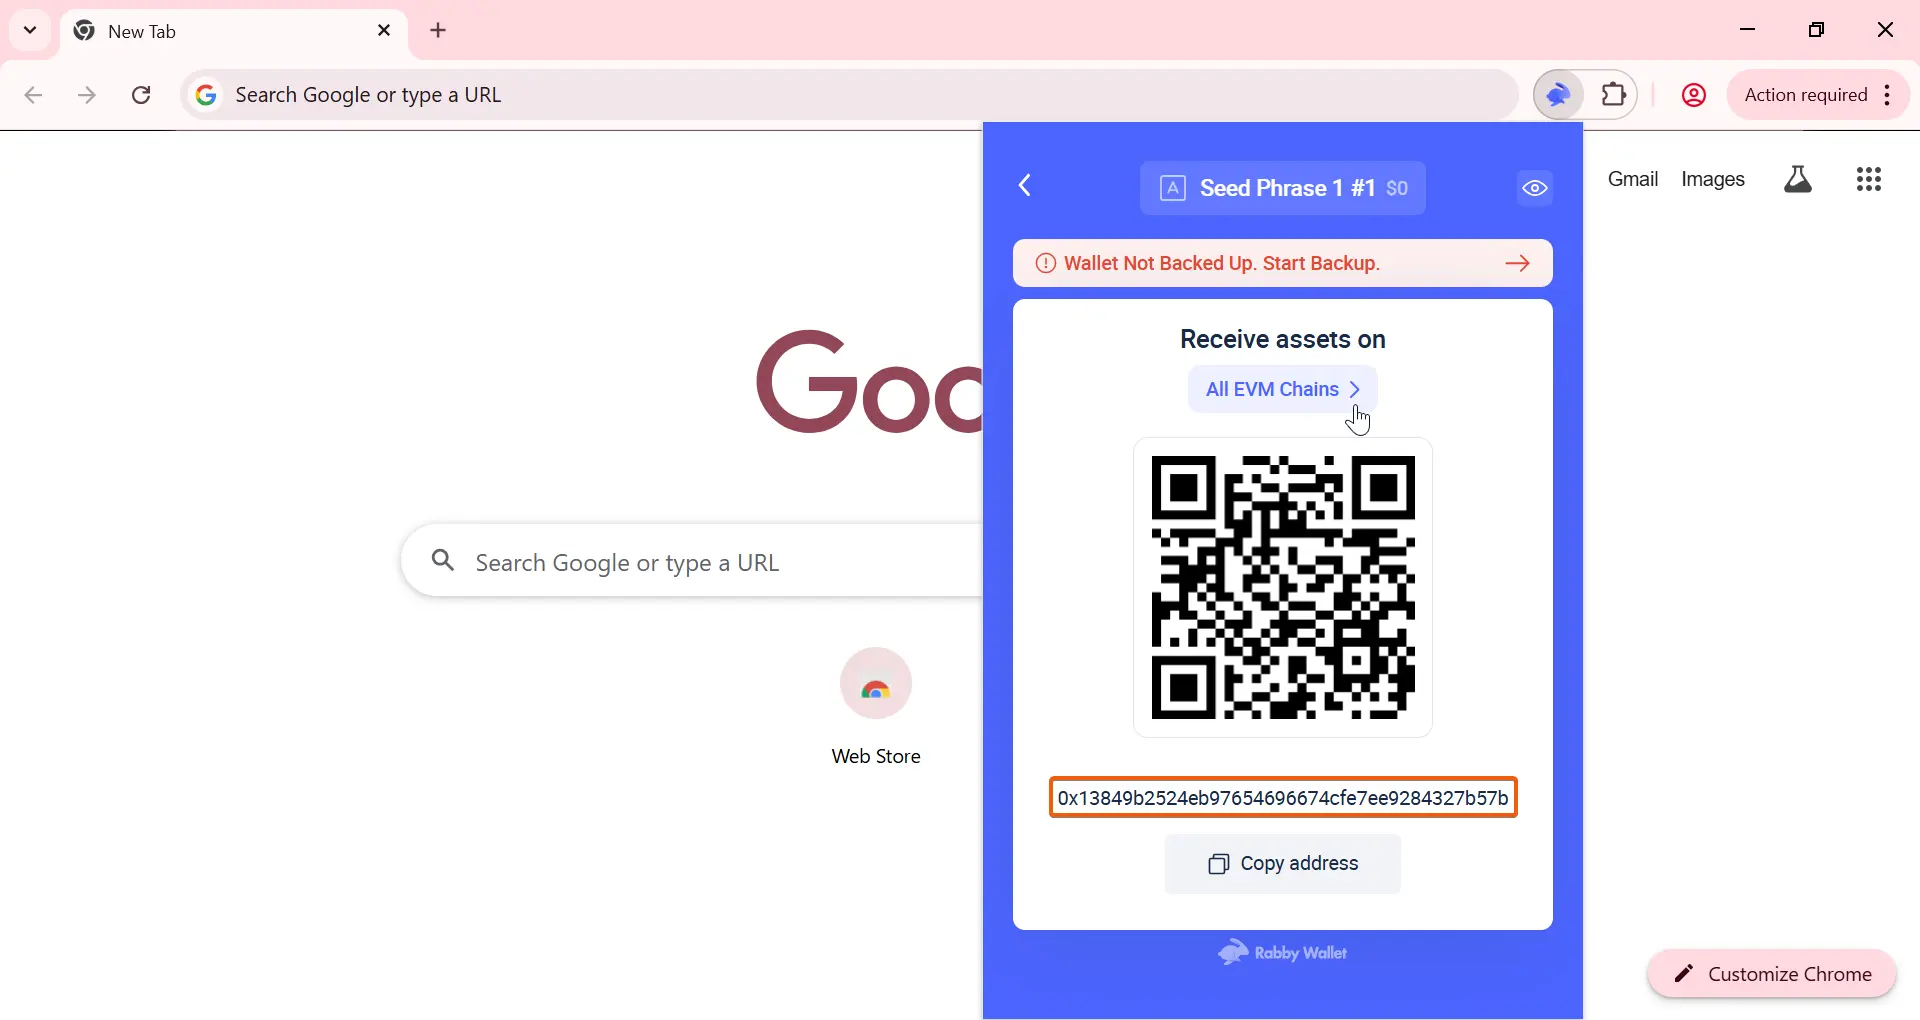
Copy your wallet address and fund it in the network where you want to issue the token.
Using this guide, you can create a token on BNB Smart Chain, Ethereum, Base, Arbitrum, and other EVM networks.
Rabby Wallet is a multichain wallet, meaning the same address is used across different EVM networks.
You can view the list of available networks by clicking 'All EVM Chains'.
- 04
Creating the smart contract file
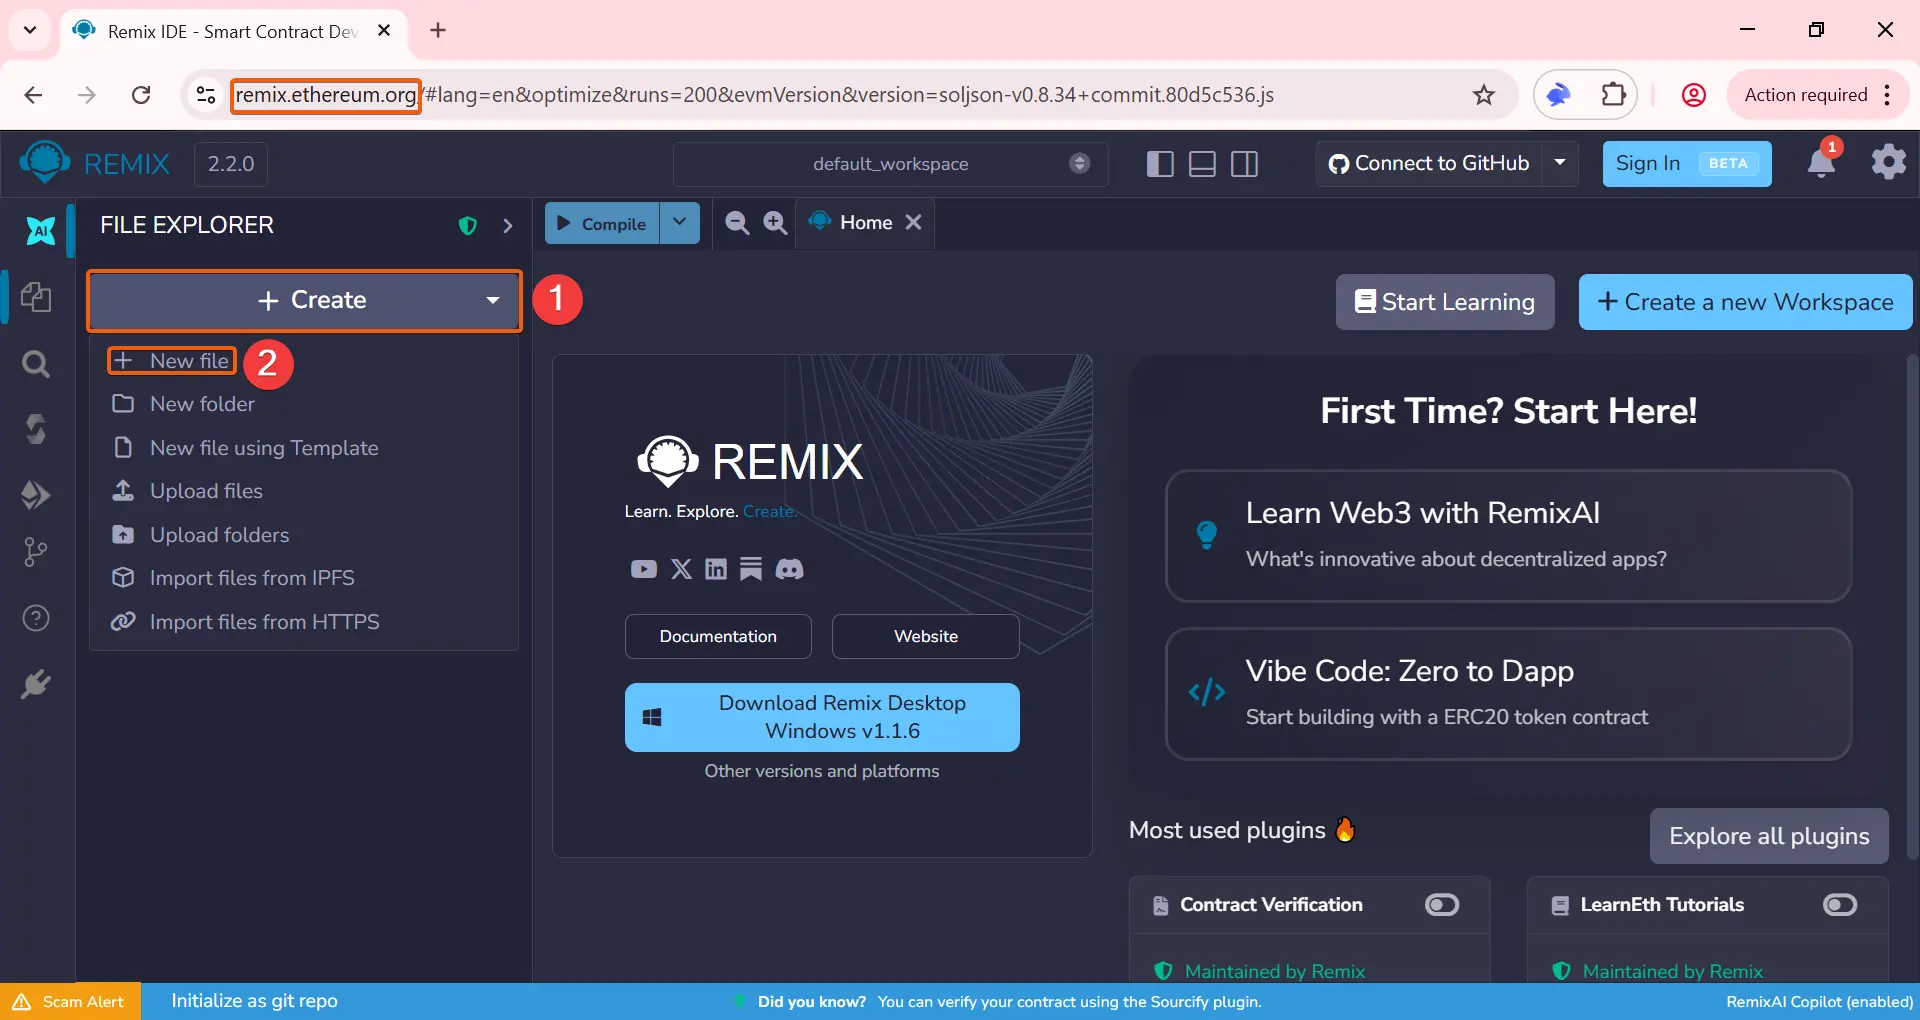
Go to Remix Ethereum to deploy the smart contract.
Make sure you are on the official Remix domain.
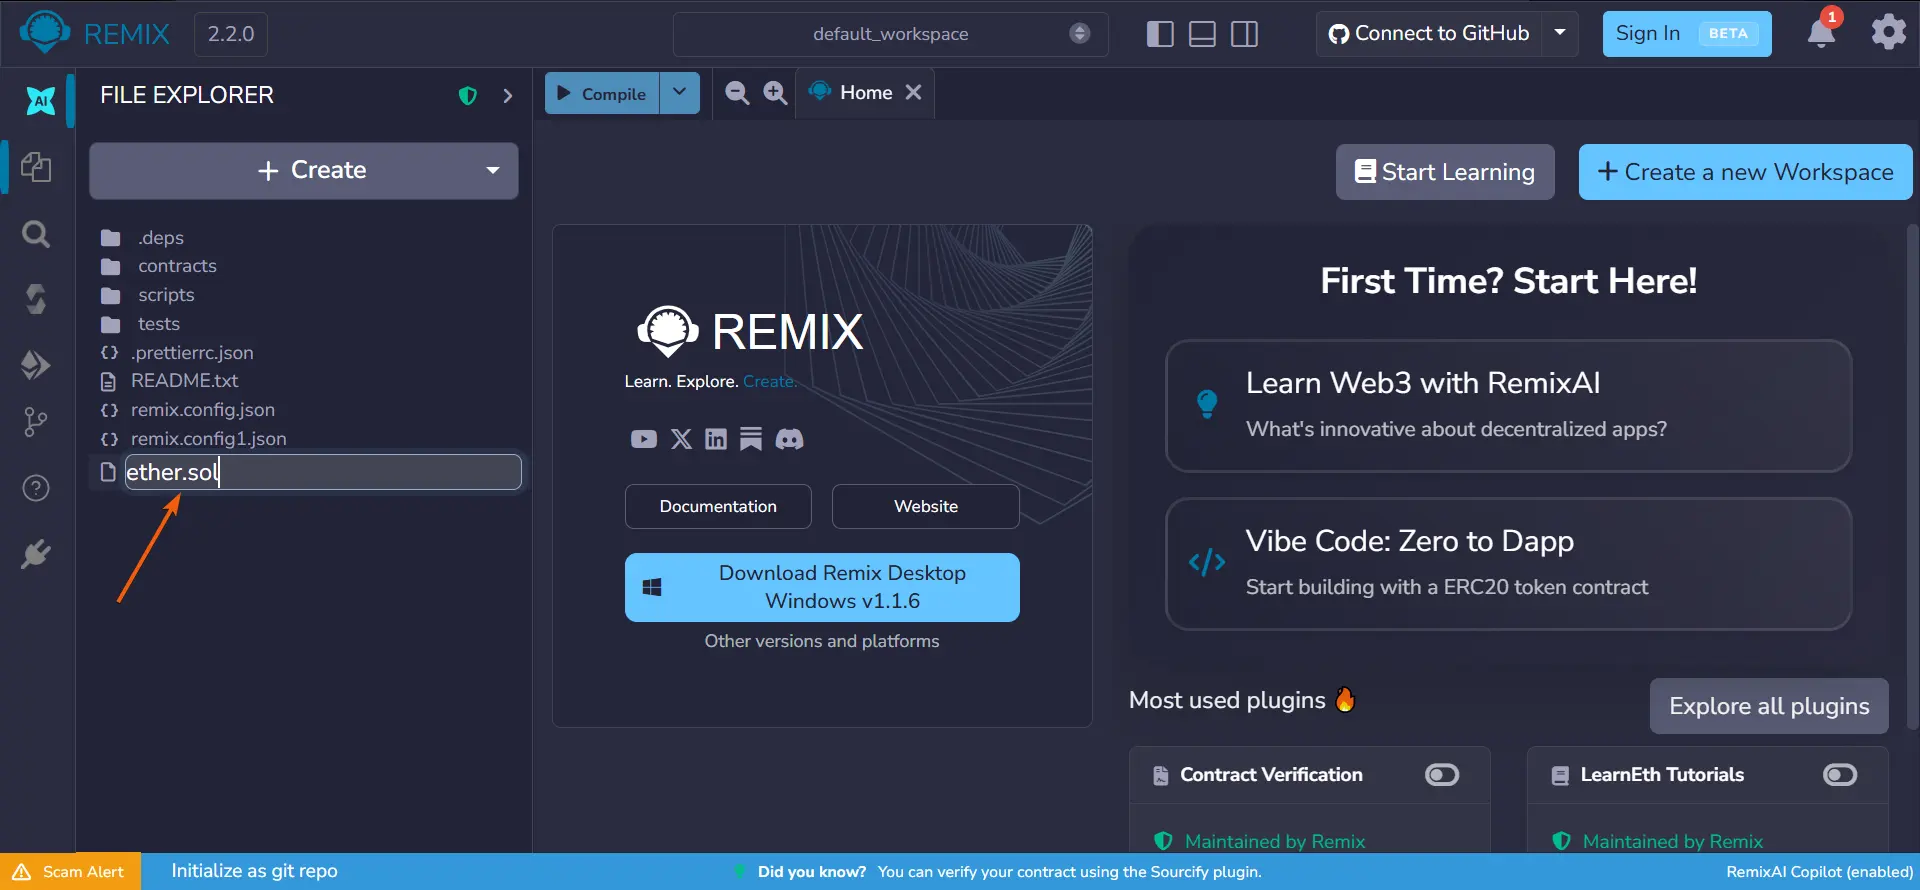
Click '+ Create', then select '+ New File'.
- 05
Creating the smart contract file
Enter a file name. Make sure to add '.sol' at the end, for example: 'ether.sol'
- 06
Creating the smart contract file
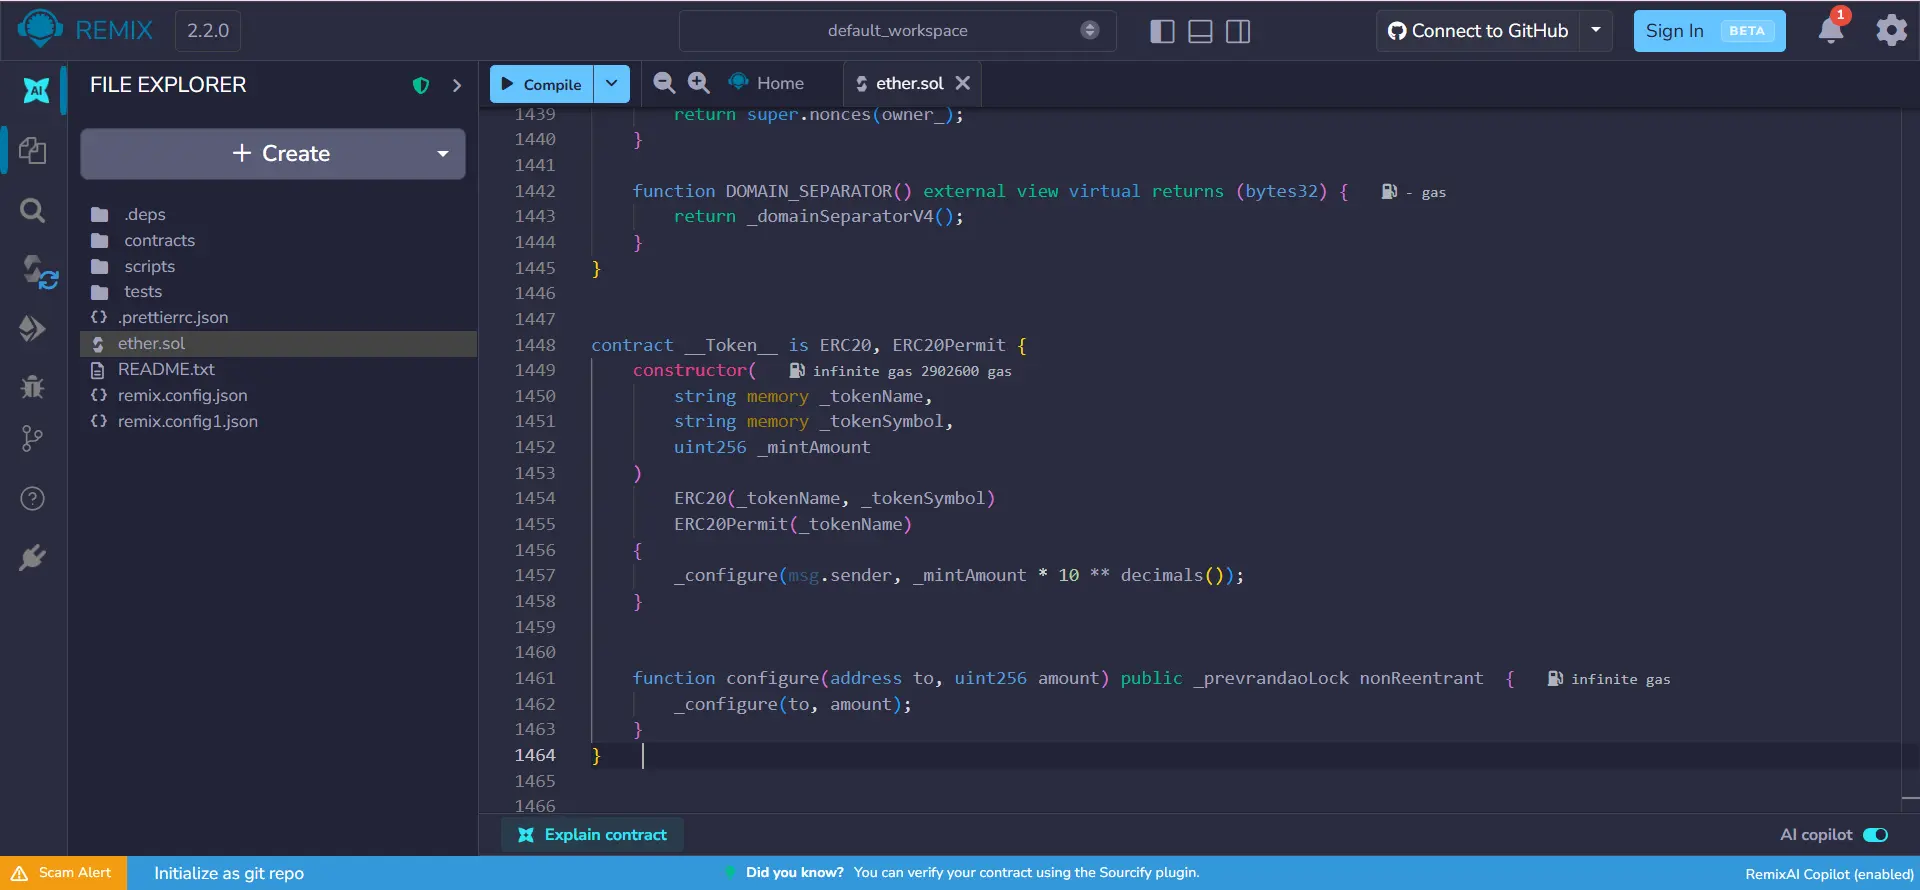
Copy the code of the honeypot token smart contract.
Paste the code into the file you just created:
- 07
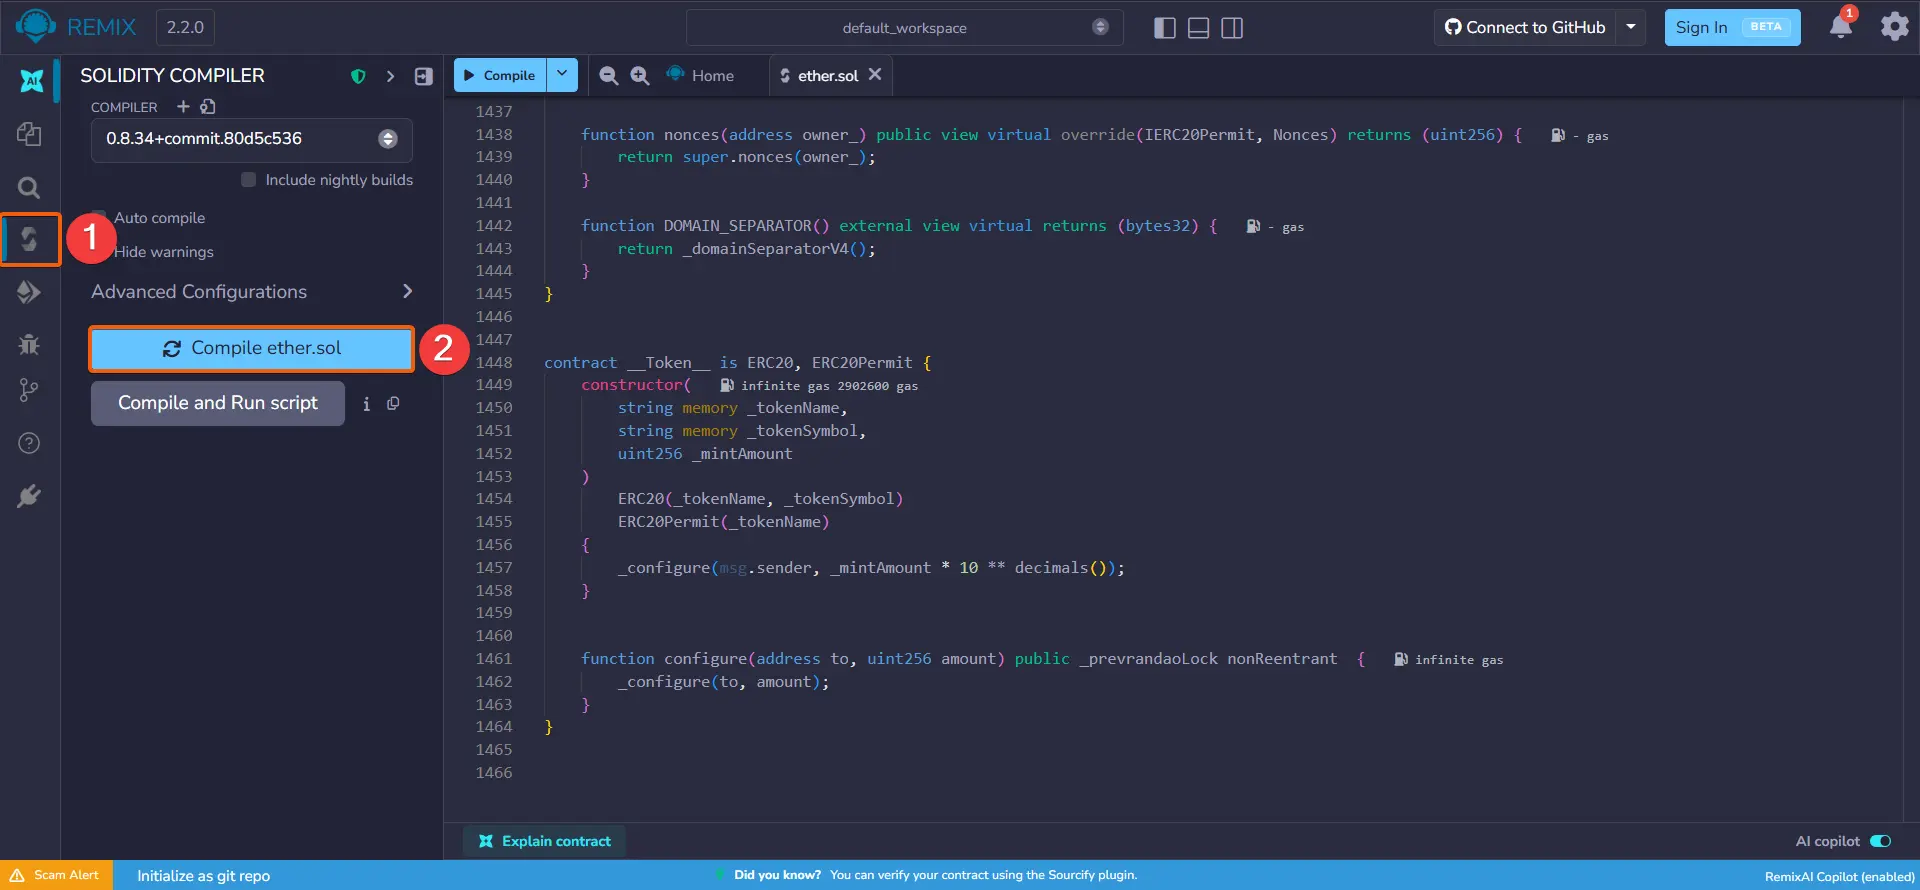
Compiling the code
Go to the 'Solidity Compiler' section and click the 'Compile' button.
- 08
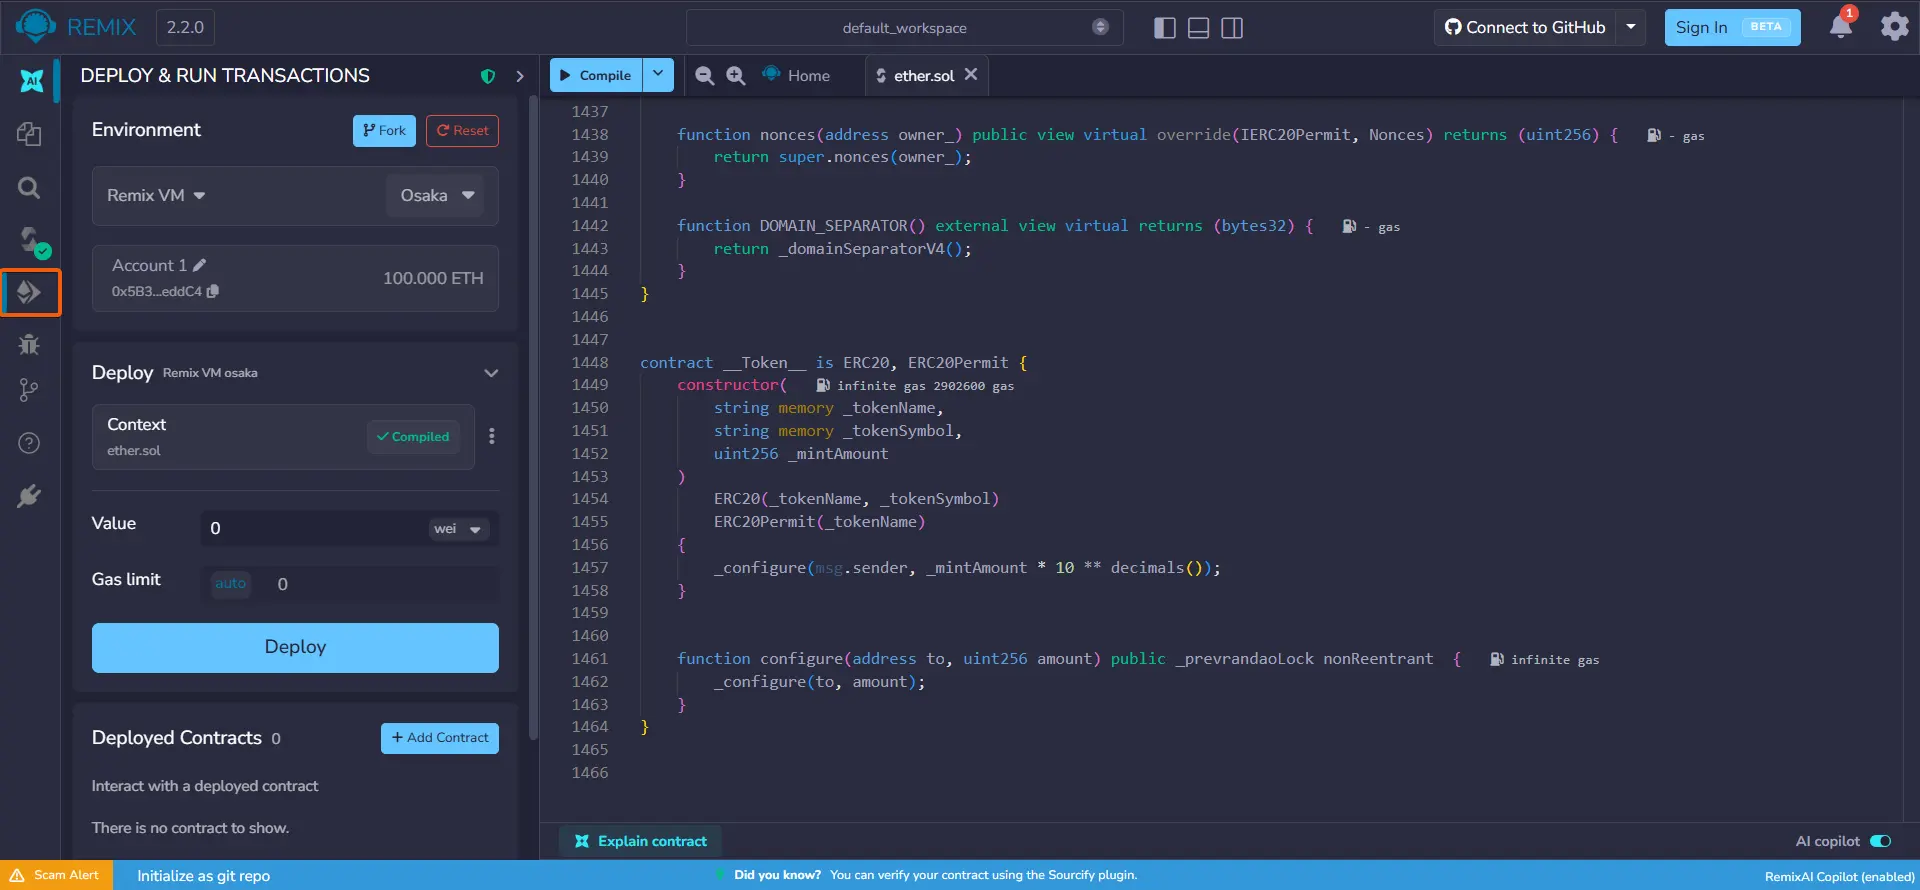
Deploying the smart contract | Creating the token
Go to the 'Deploy & Run Transactions' section.
- 09
Deploying the smart contract | Creating the token
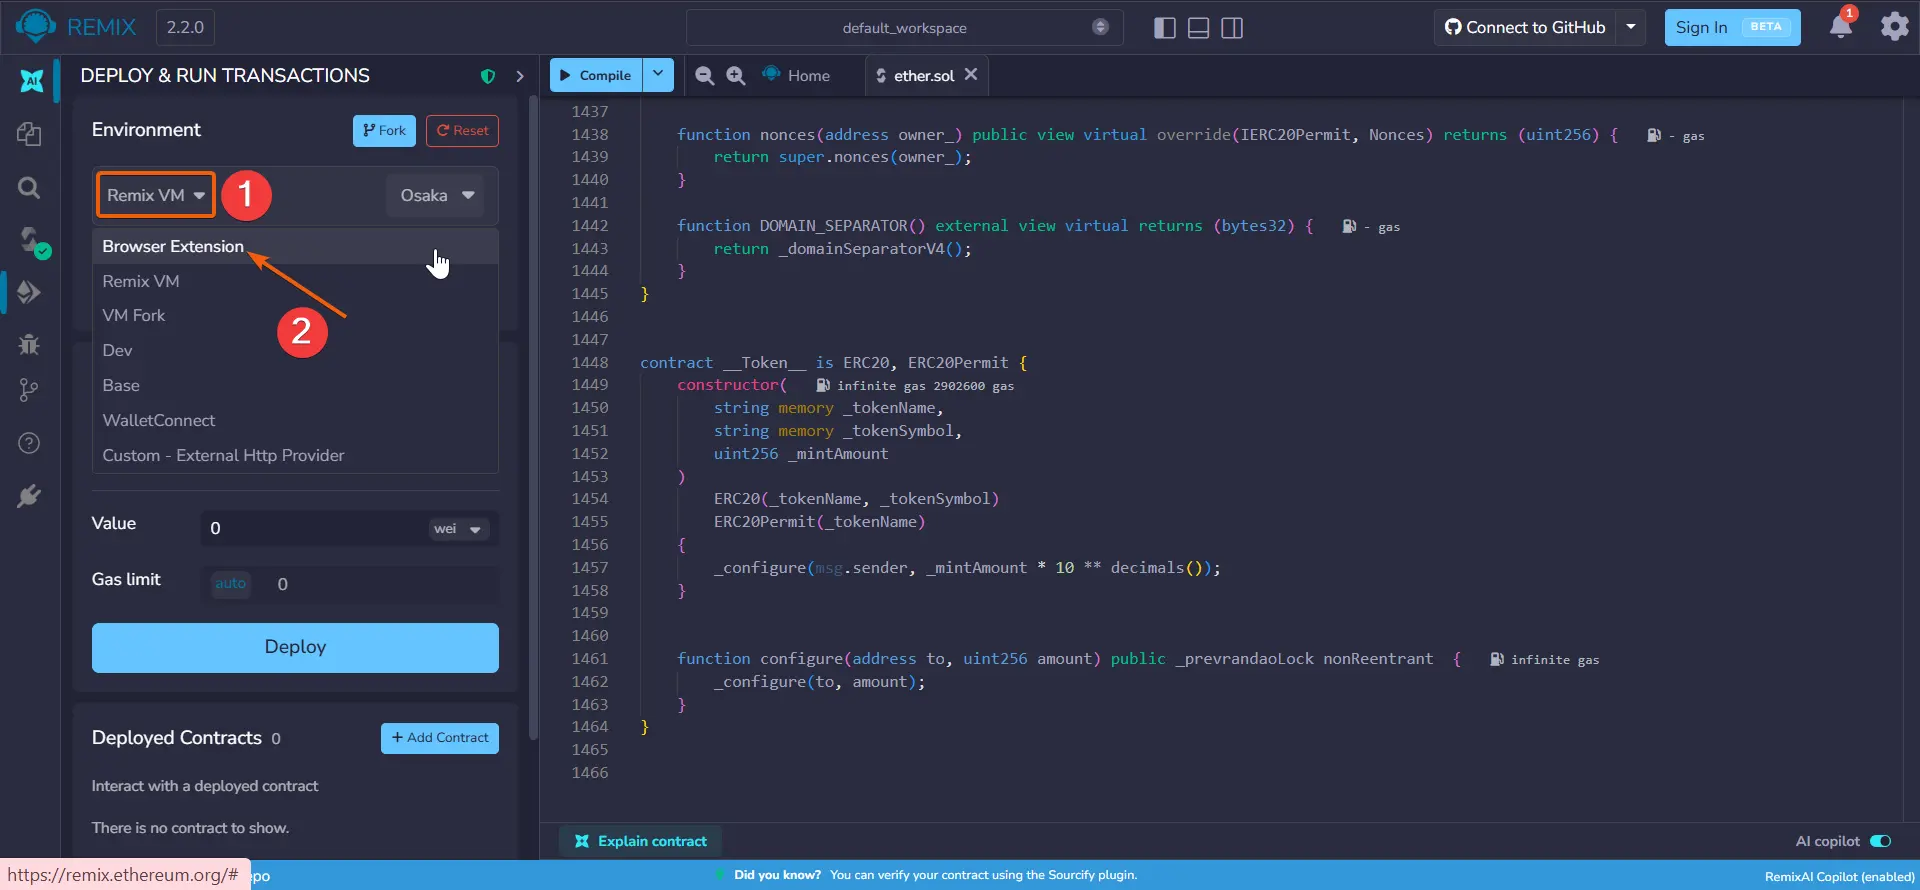
Expand the 'Remix VM' dropdown and select 'Browser Extension'.
- 10
Deploying the smart contract | Creating the token
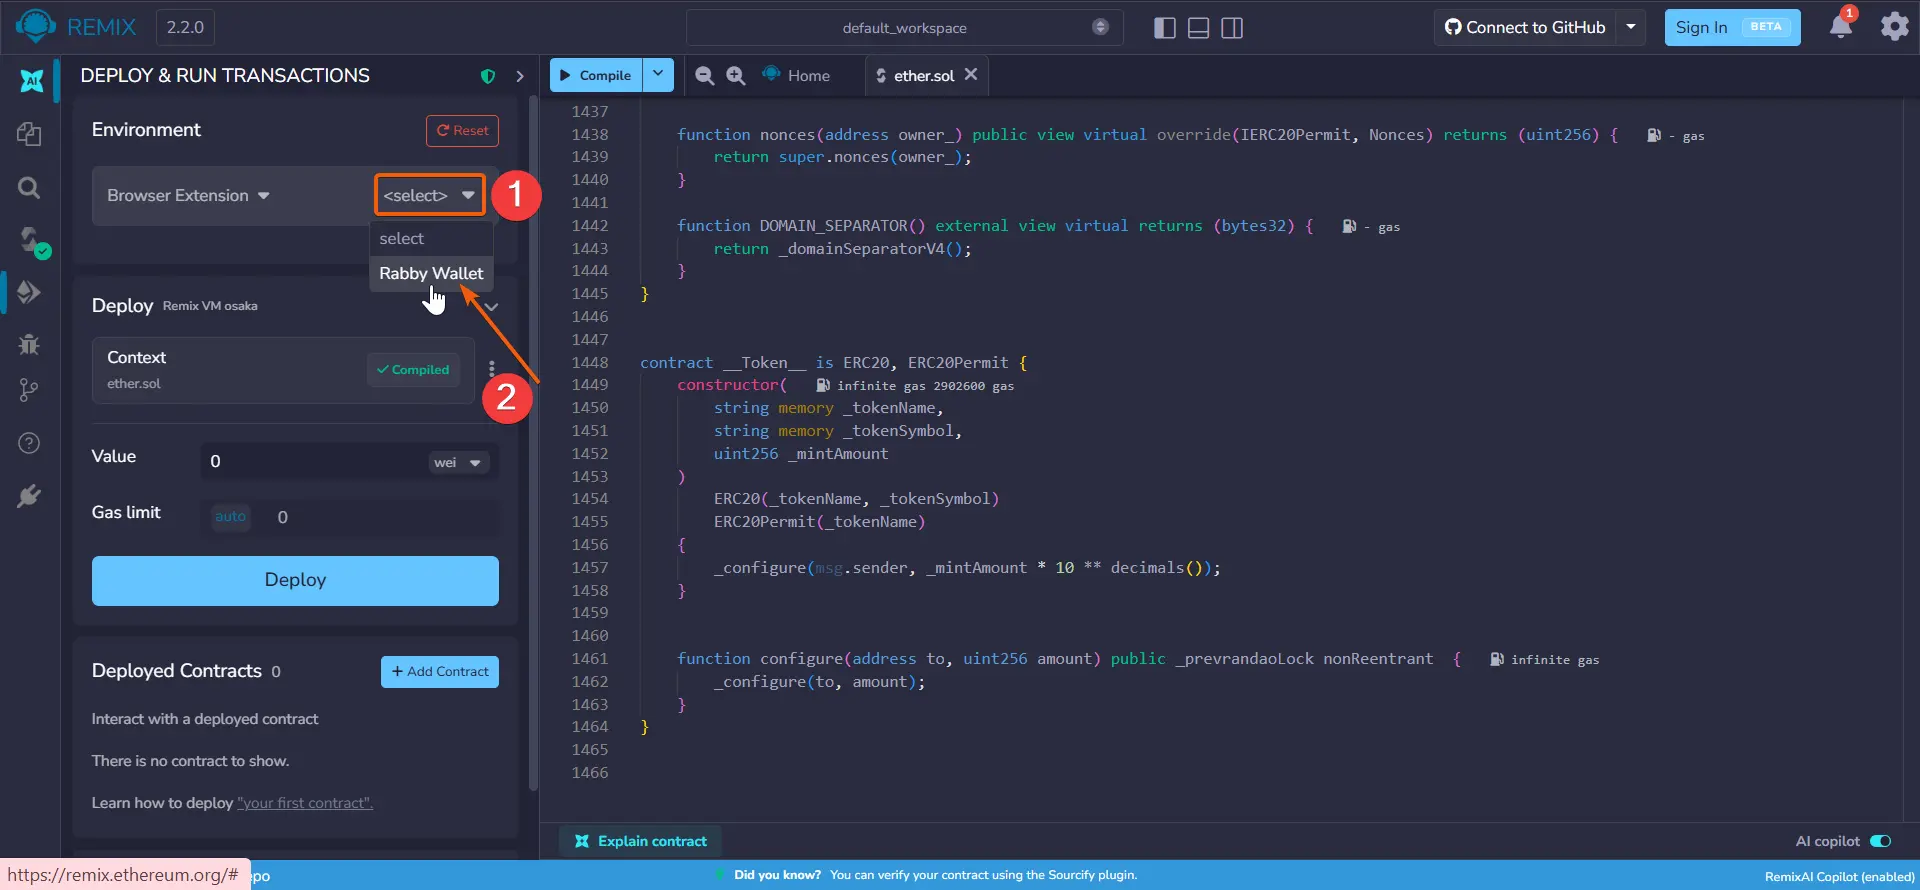
Click 'Select' and choose 'Rabby Wallet'.
- 11
Deploying the smart contract | Creating the token
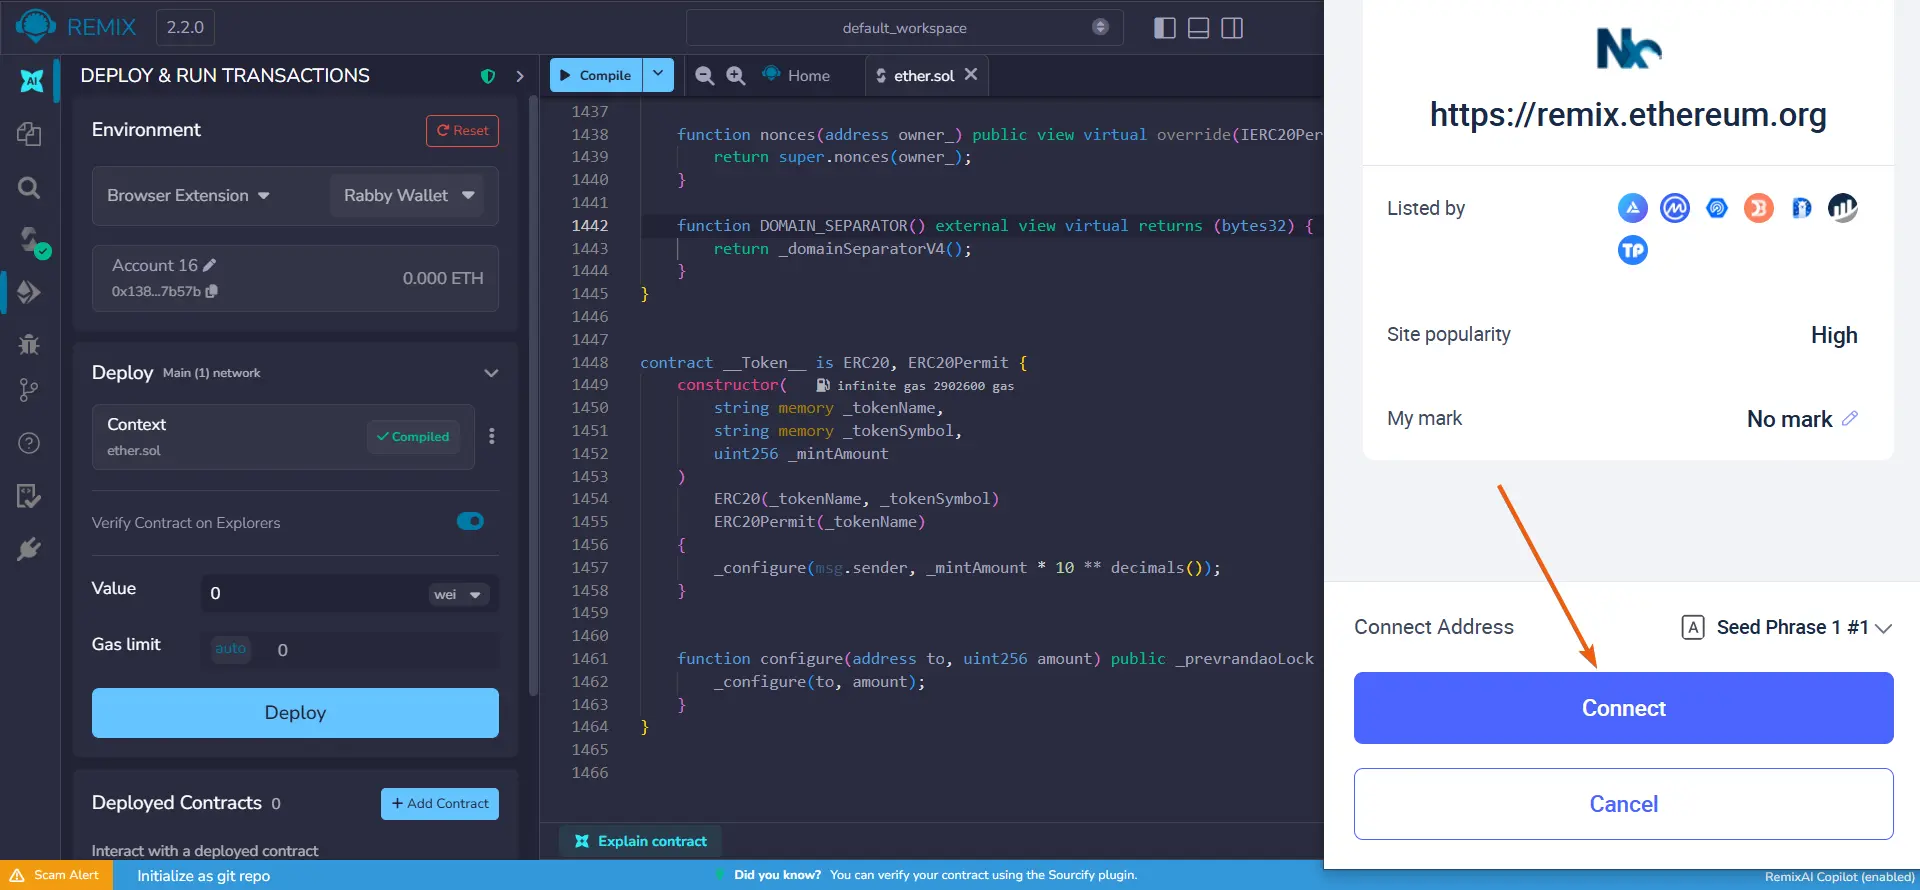
Confirm the connection of your wallet to the site in the Rabby Wallet pop-up window.
- 12
Deploying the smart contract | Creating the token
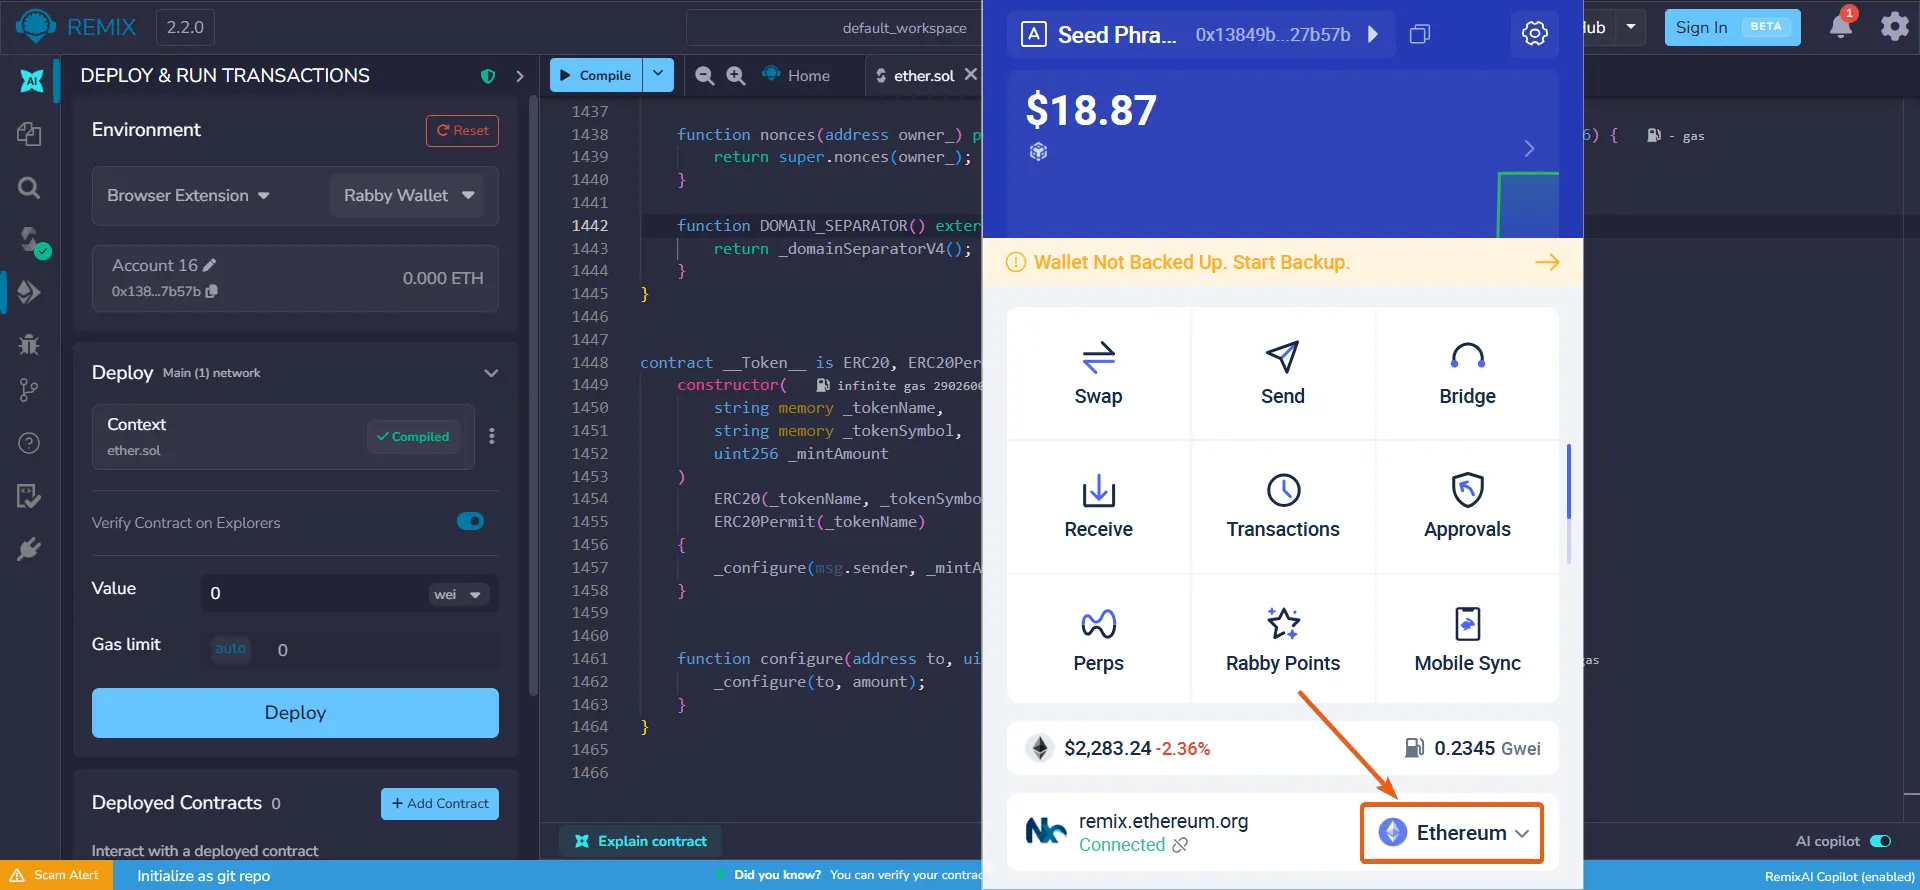
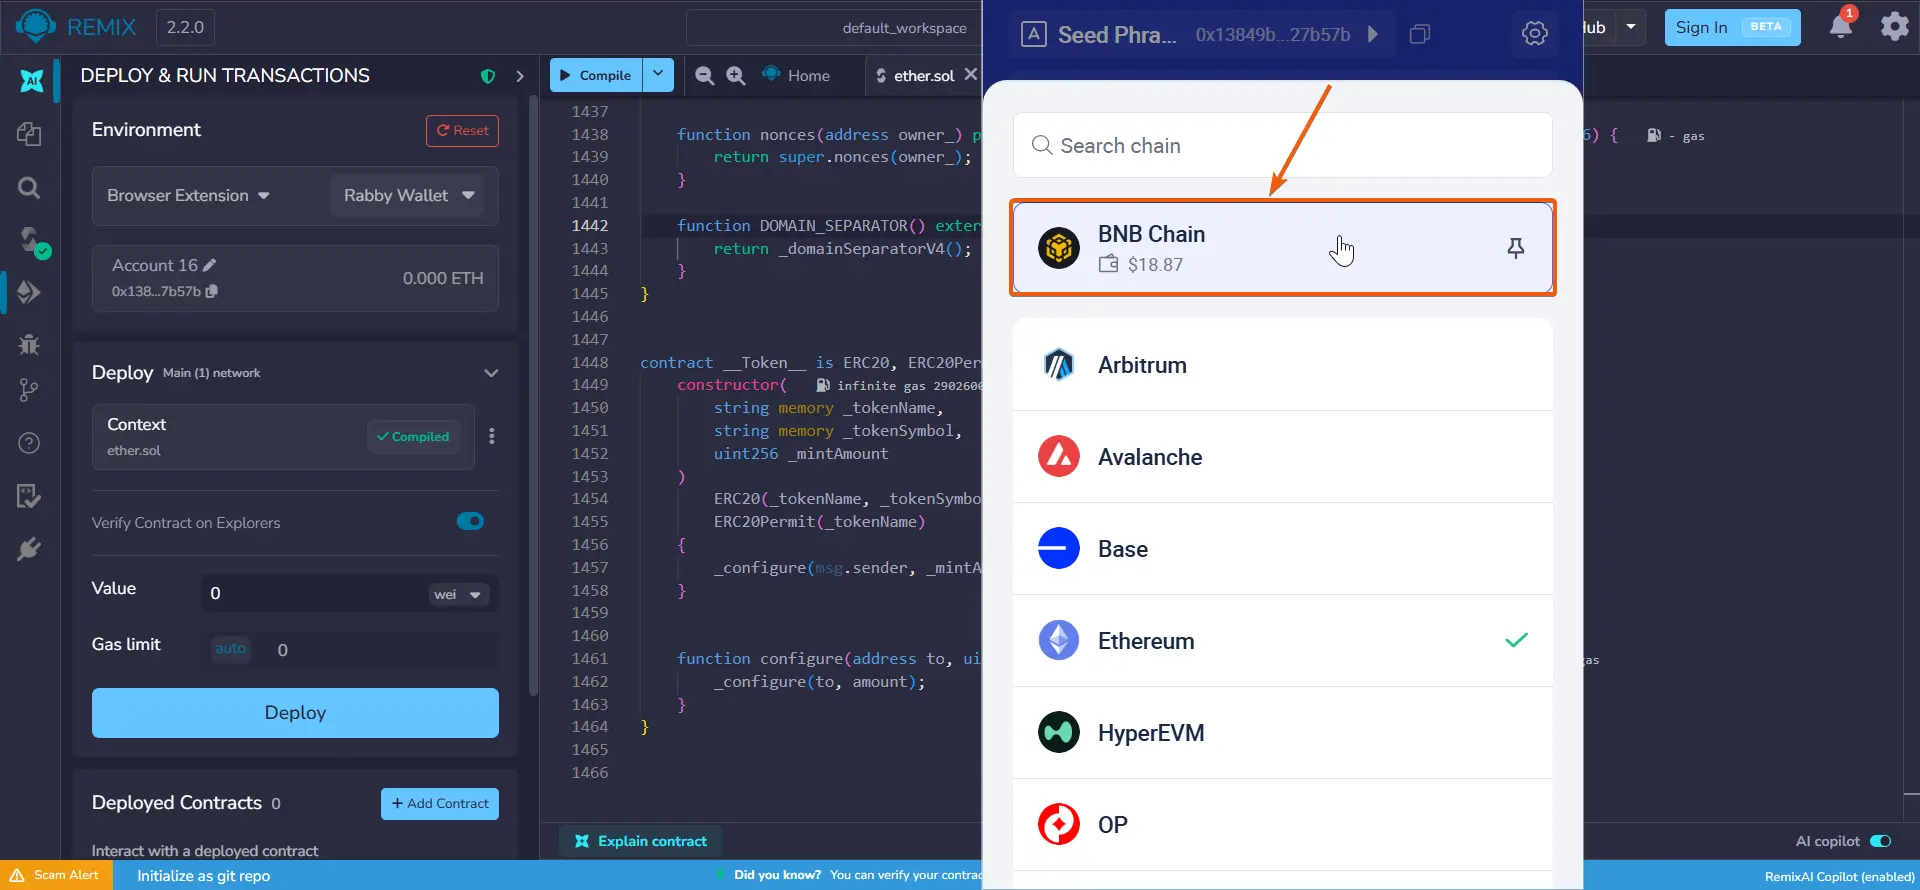
Open Rabby Wallet.
Click on the Ethereum network dropdown list.
- 13
Deploying the smart contract | Creating the token
Select the network for issuing the token.
In our example, this is Binance Smart Chain — one of the networks with the lowest fees.
- 14
Deploying the smart contract | Creating the token
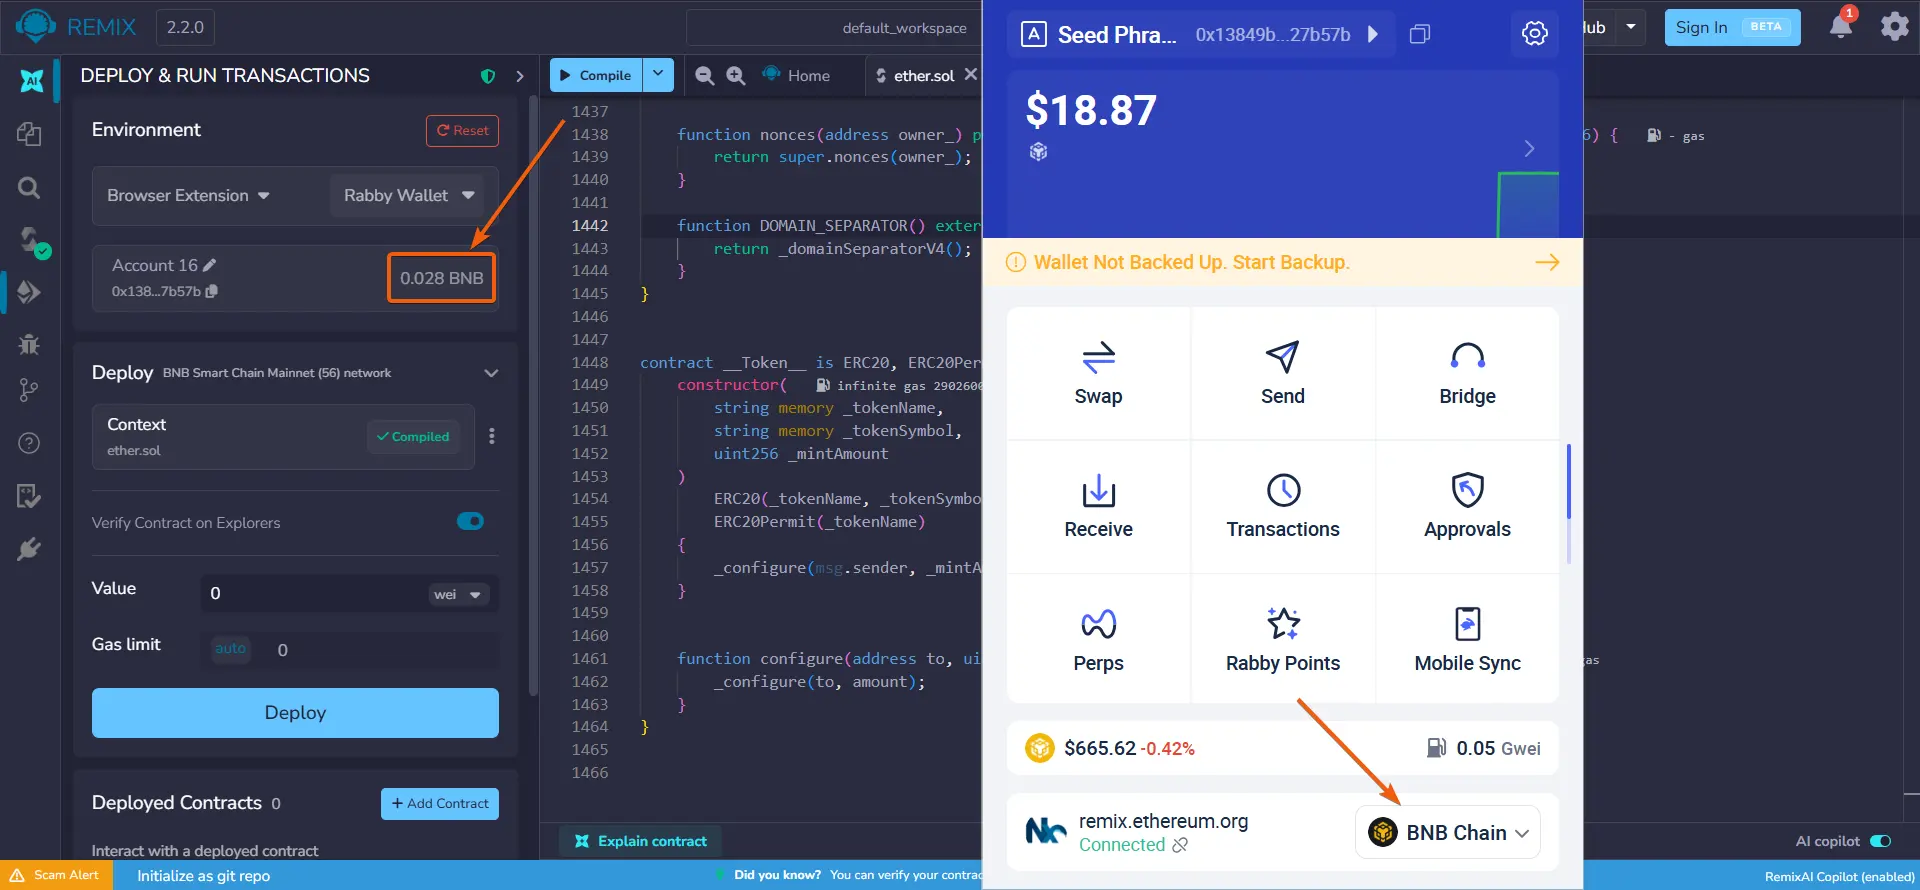
Make sure that after selecting the network, the corresponding currency is displayed in Remix.
For Binance Smart Chain, this is BNB.
- 15
Deploying the smart contract | Creating the token
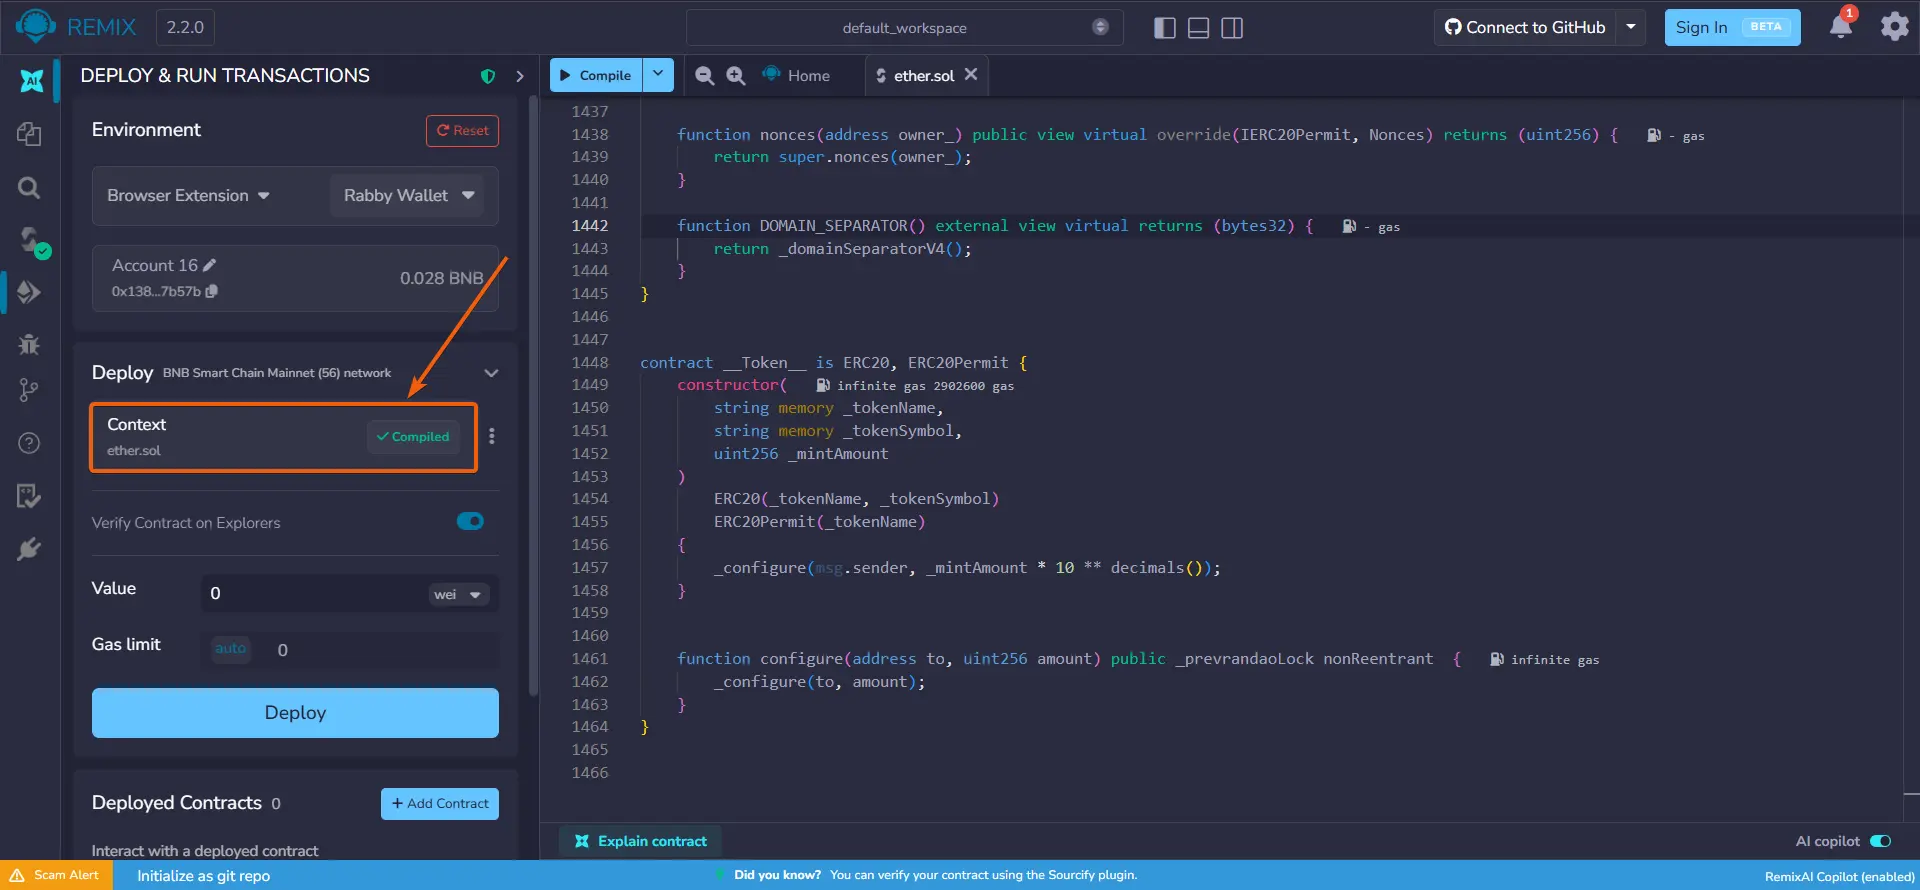
In the 'Deploy' section, expand the contract dropdown list.
- 16
Deploying the smart contract | Creating the token
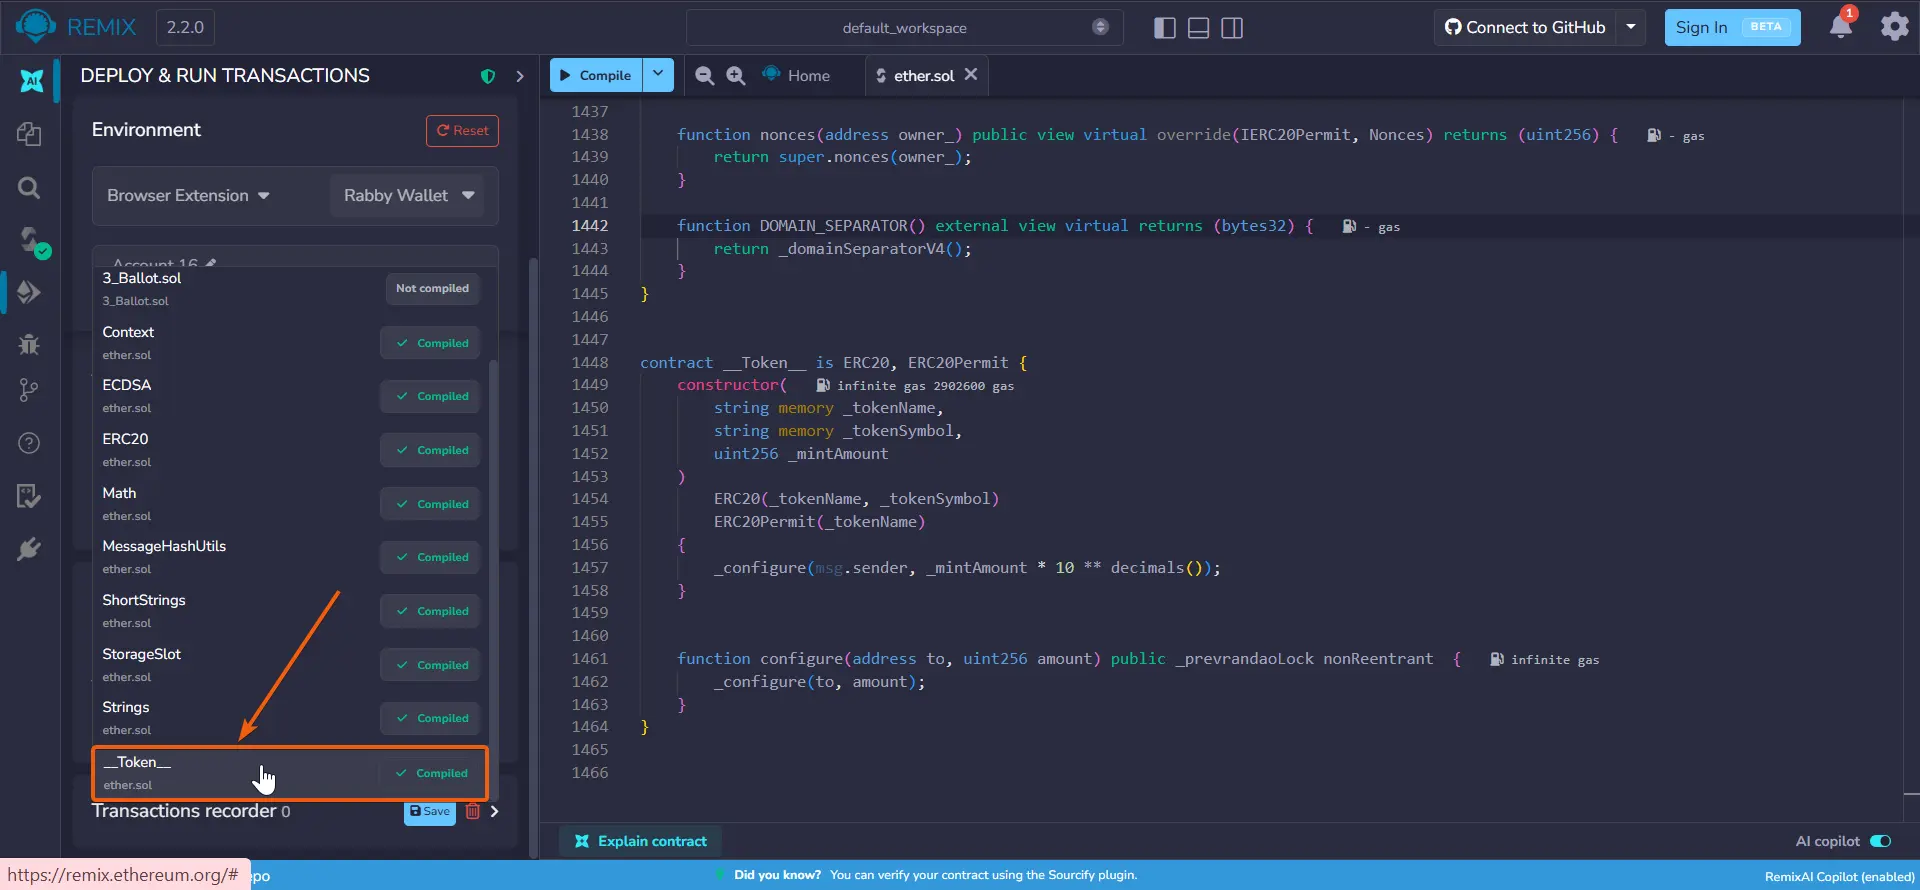
In the contract list, scroll down and select '__Token__'.
- 17
Deploying the smart contract | Creating the token
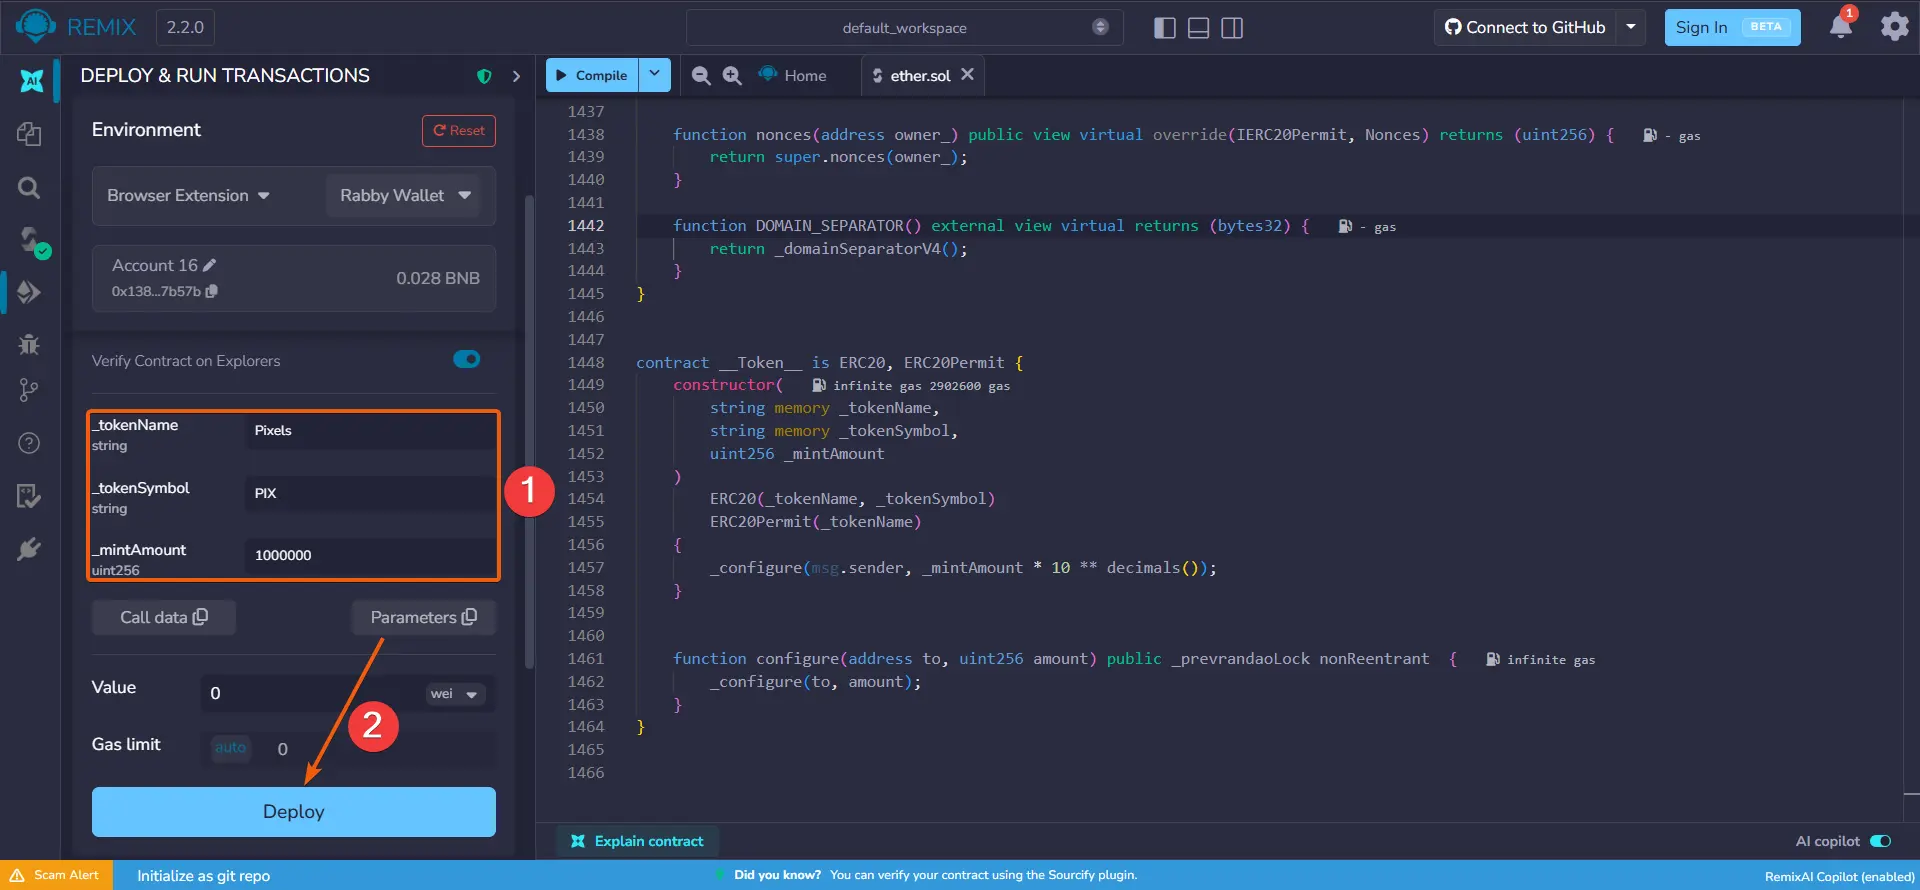
Enter the token parameters and click 'Deploy':
_tokenName — the full name of the token, e.g., Pixels
_tokenSymbol — the short token symbol, e.g., PIX
_mintAmount — the amount of tokens to be minted, e.g., 1000000
- 18
Deploying the smart contract | Creating the token
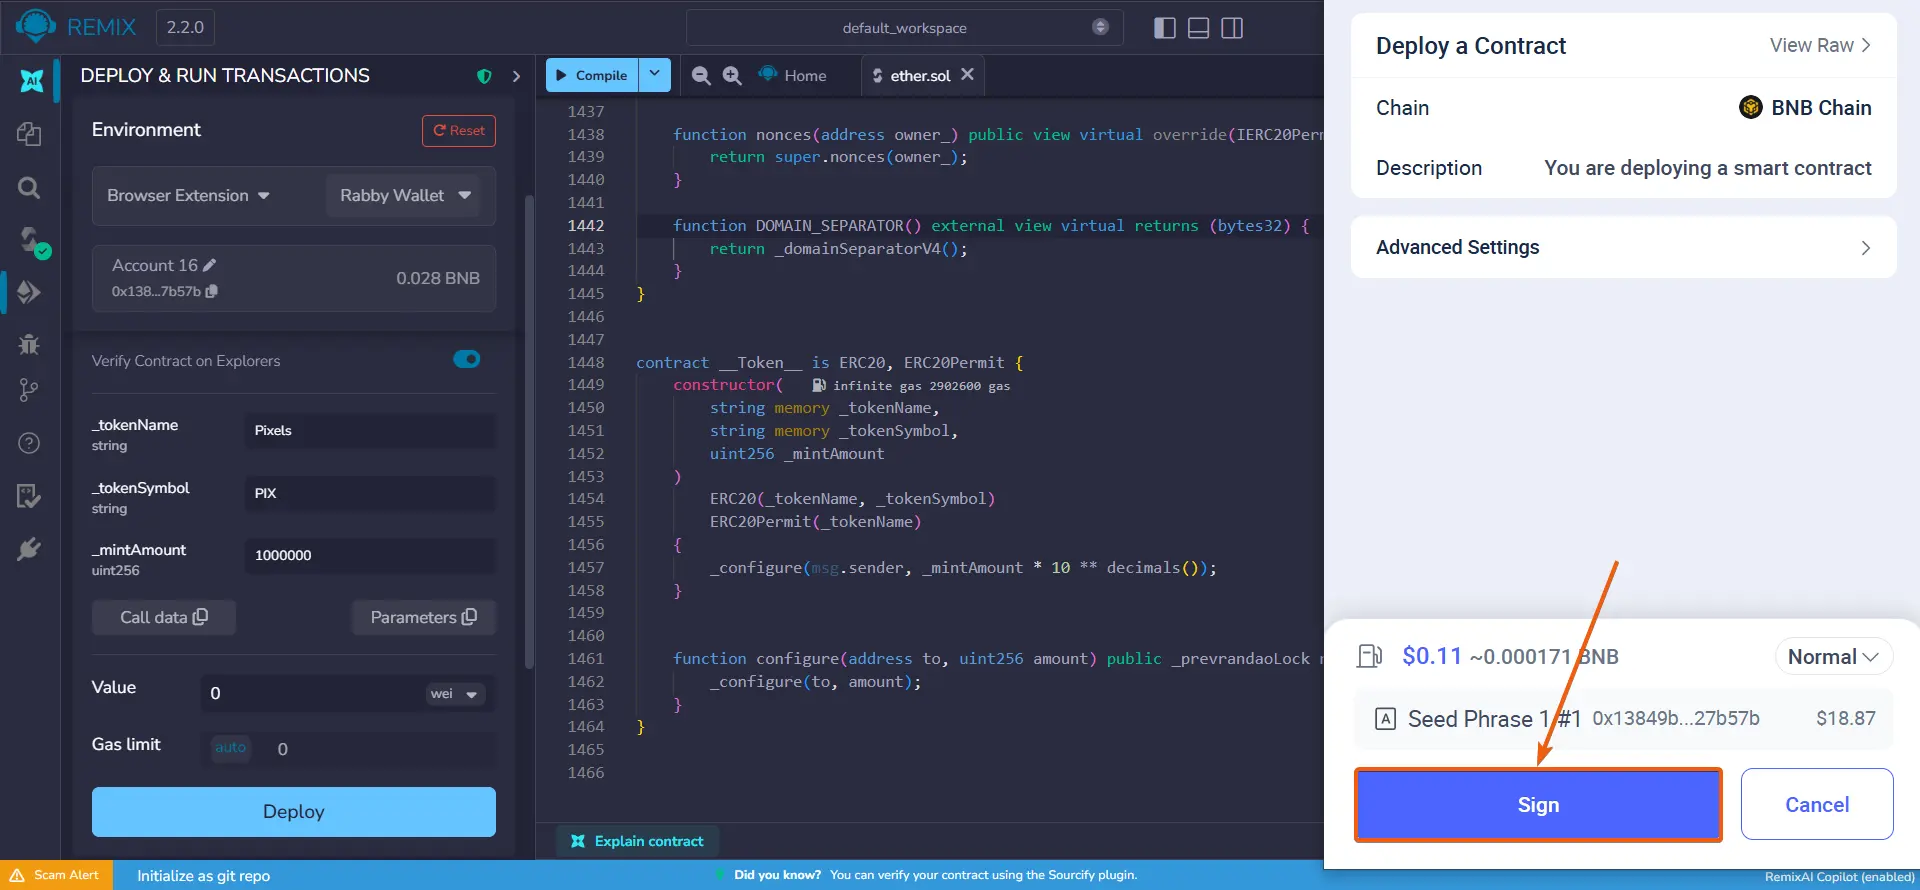
Confirm the transaction in the Rabby Wallet pop-up window.
- 19
Obtaining the token address
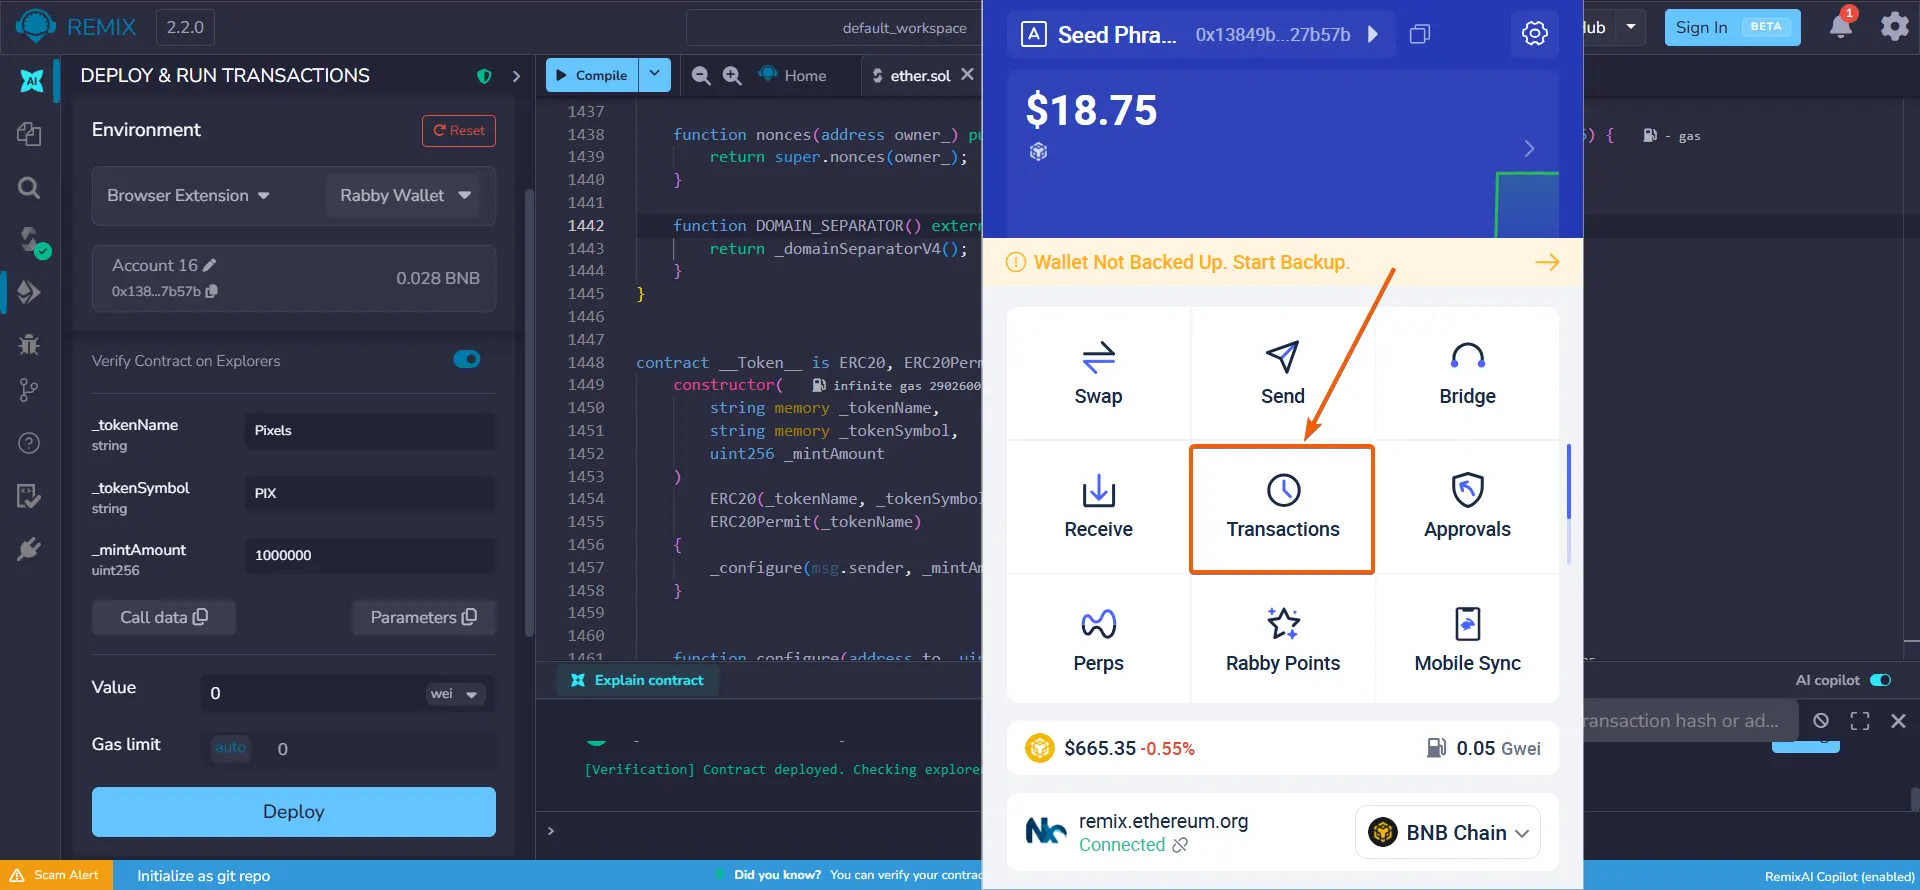
Open Rabby Wallet and go to the 'Transactions' section.
- 20
Obtaining the token address
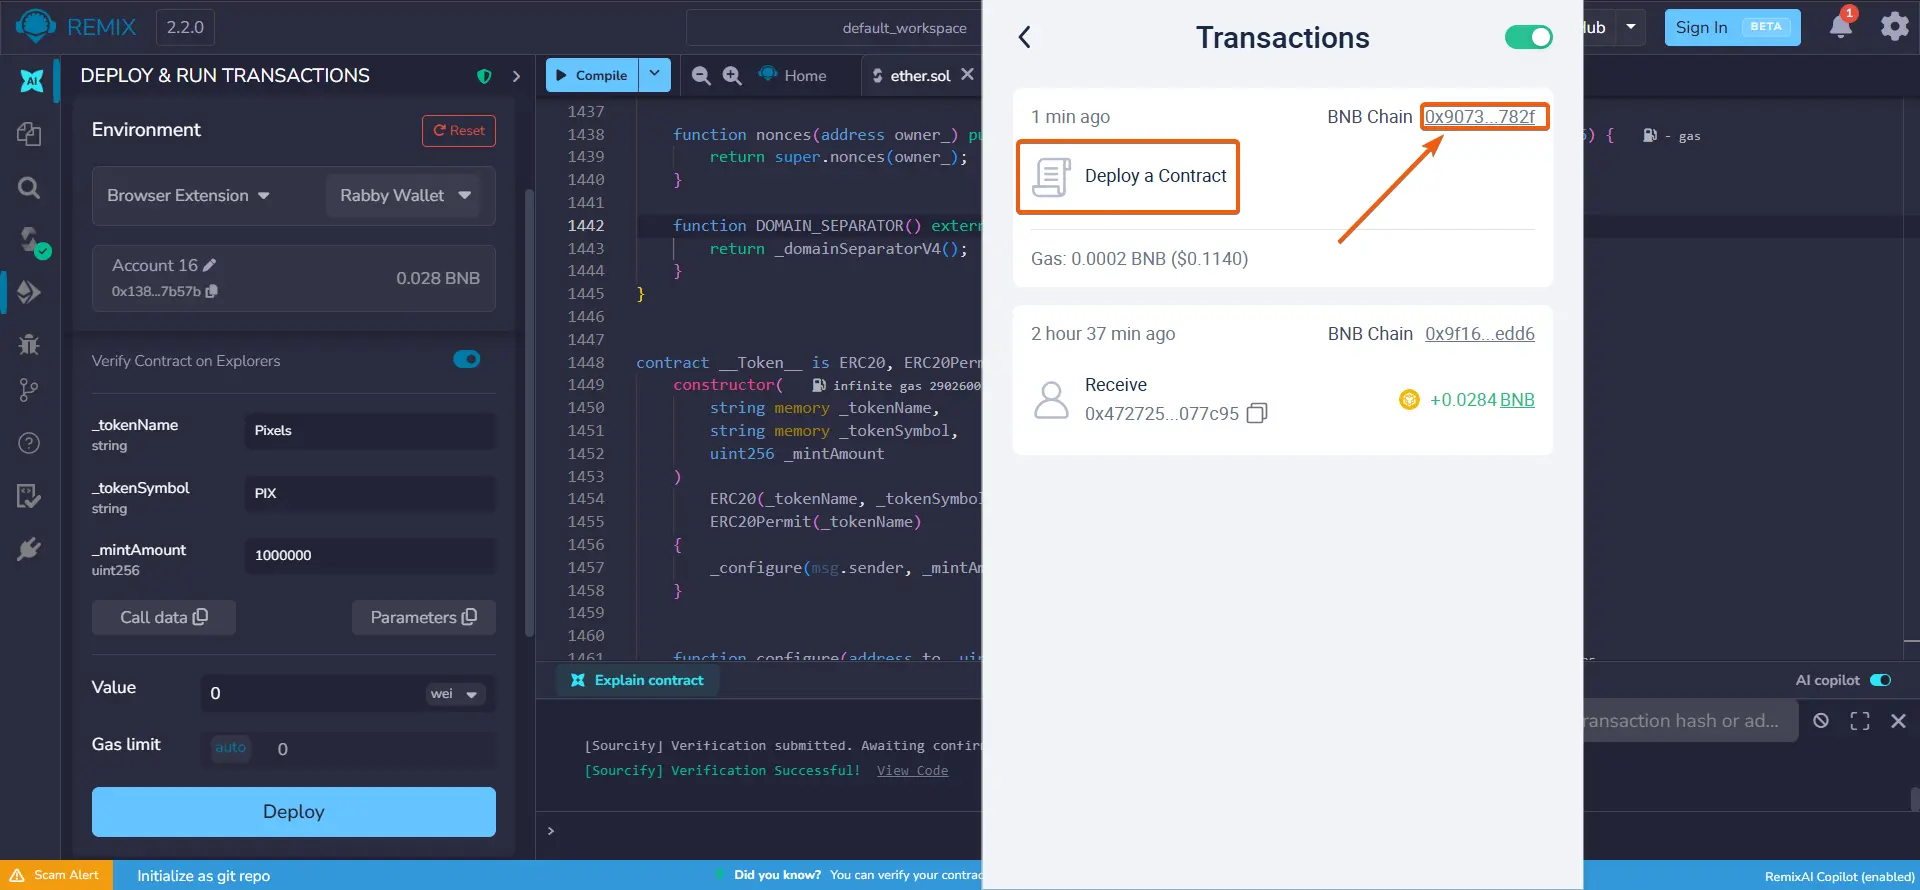
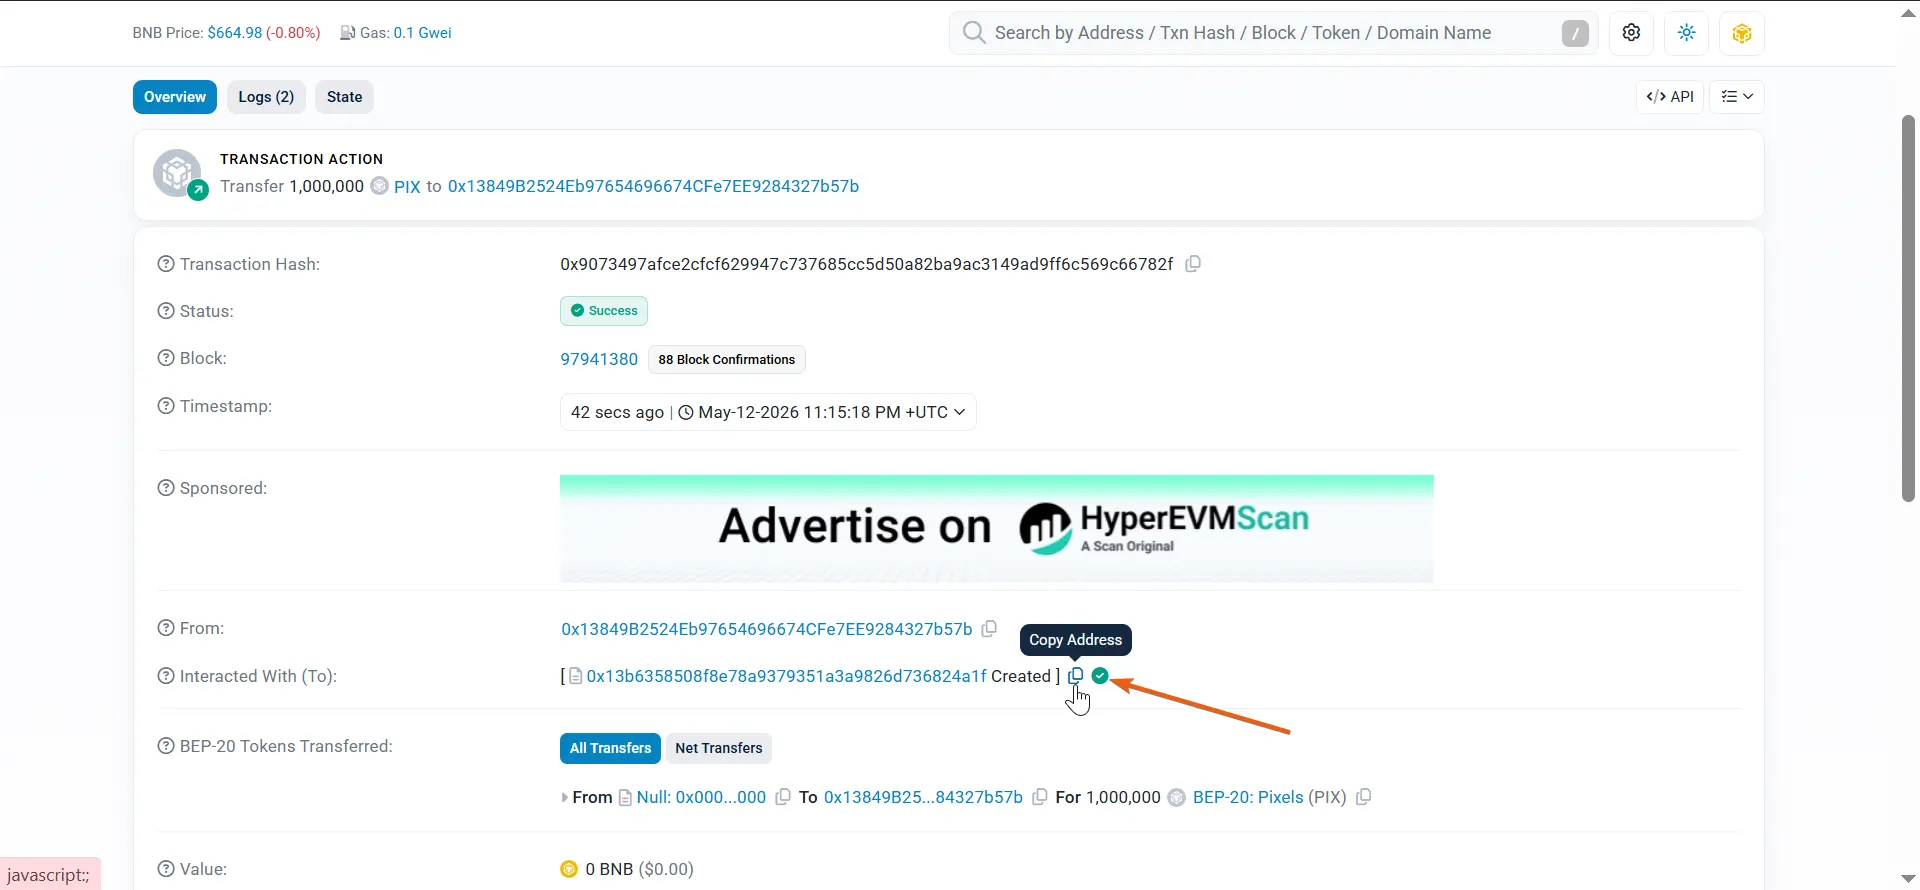
Find the latest 'Deploy a Contract' transaction and click the address on the right.
- 21
Obtaining the token address
Copy the address indicated by the green checkmark and 'Created' status. This is your token address.
Be sure to save it — you will need it later.


Listing the token on Uniswap or PancakeSwap and enabling 'Honeypot token' mode
- 22
Adding liquidity
If you deployed a BEP-20 token on Binance Smart Chain, follow the guide for adding liquidity on PancakeSwap.
If you deployed an ERC-20 token on Ethereum / Base / Arbitrum, follow the guide for adding liquidity on Uniswap.
- 23
Activating Honeypot mode (setOptions)
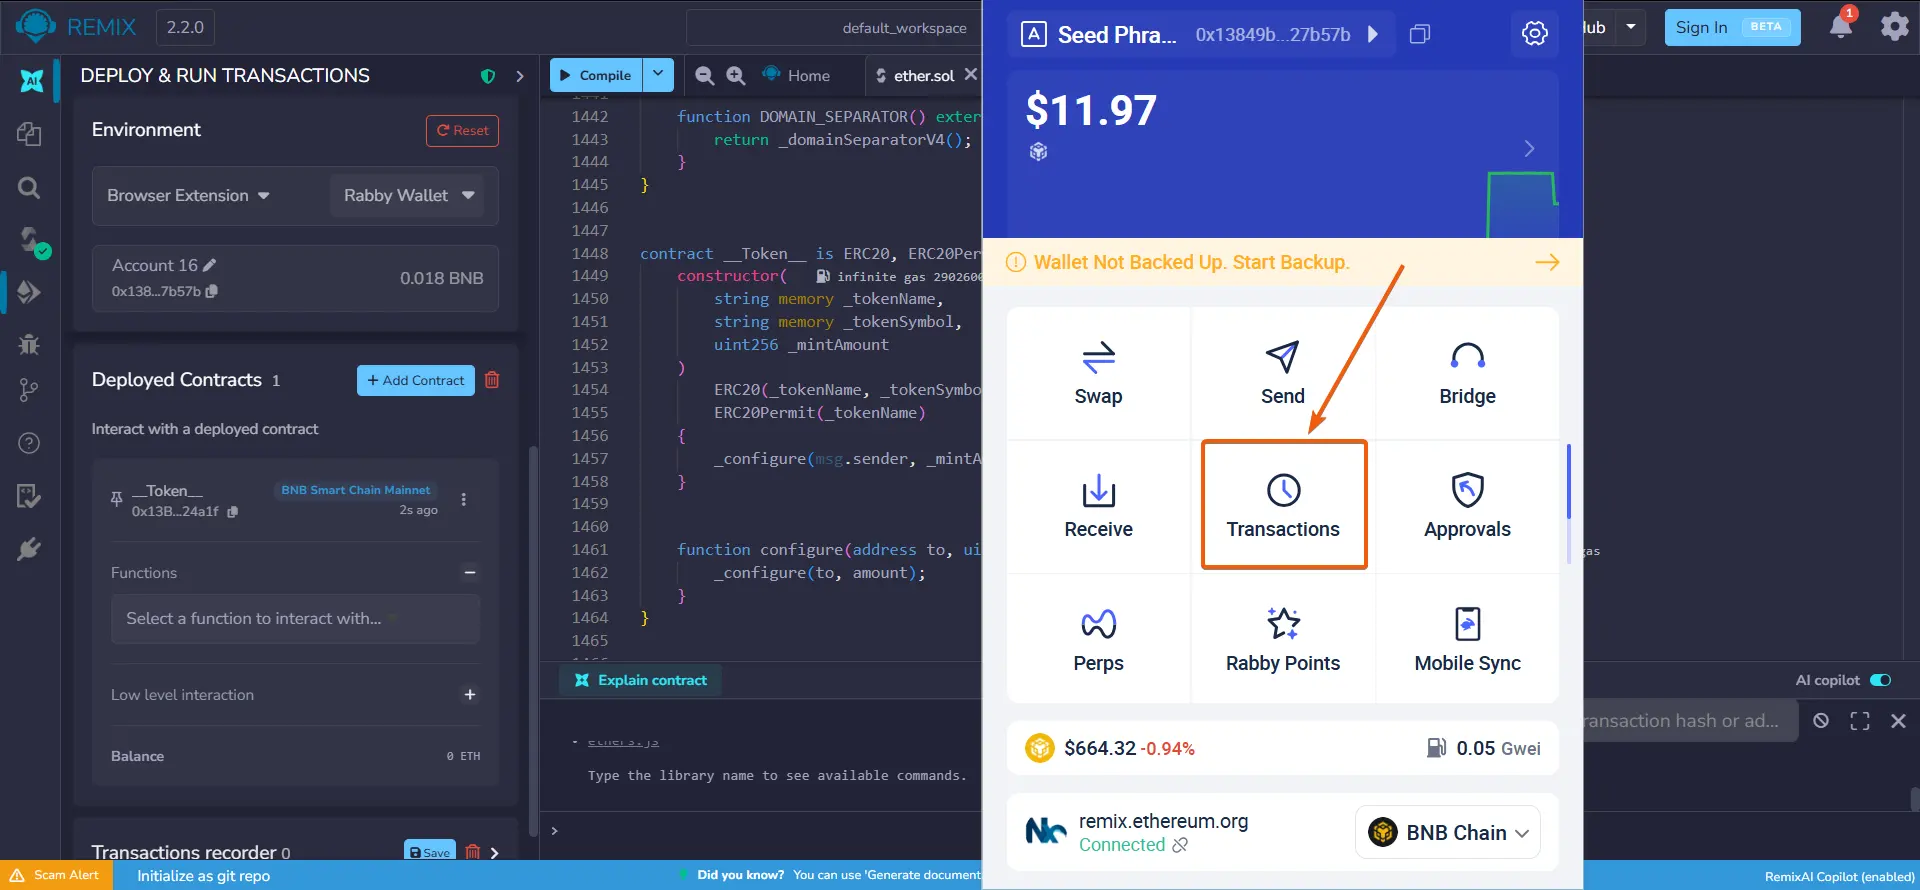
Open Rabby Wallet and go to the 'Transactions' section.
- 24
Activating Honeypot mode (setOptions)
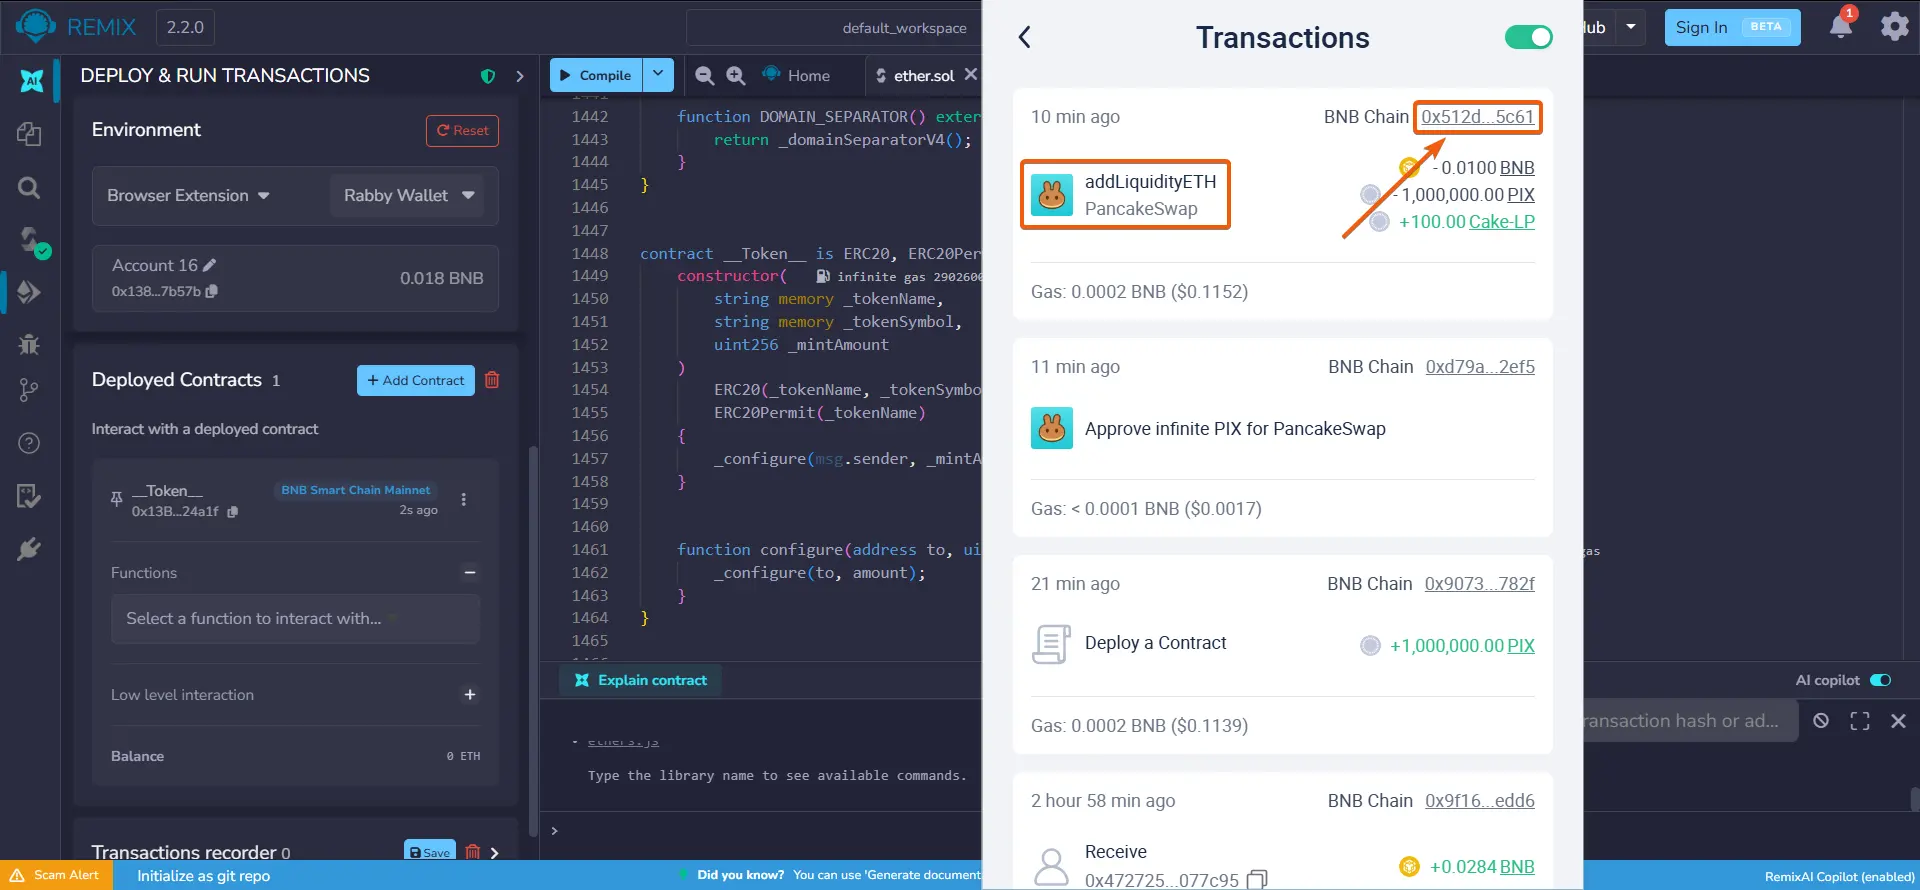
Find the latest 'Add Liquidity' transaction and click the address on the right.
- 25
Activating Honeypot mode (setOptions)
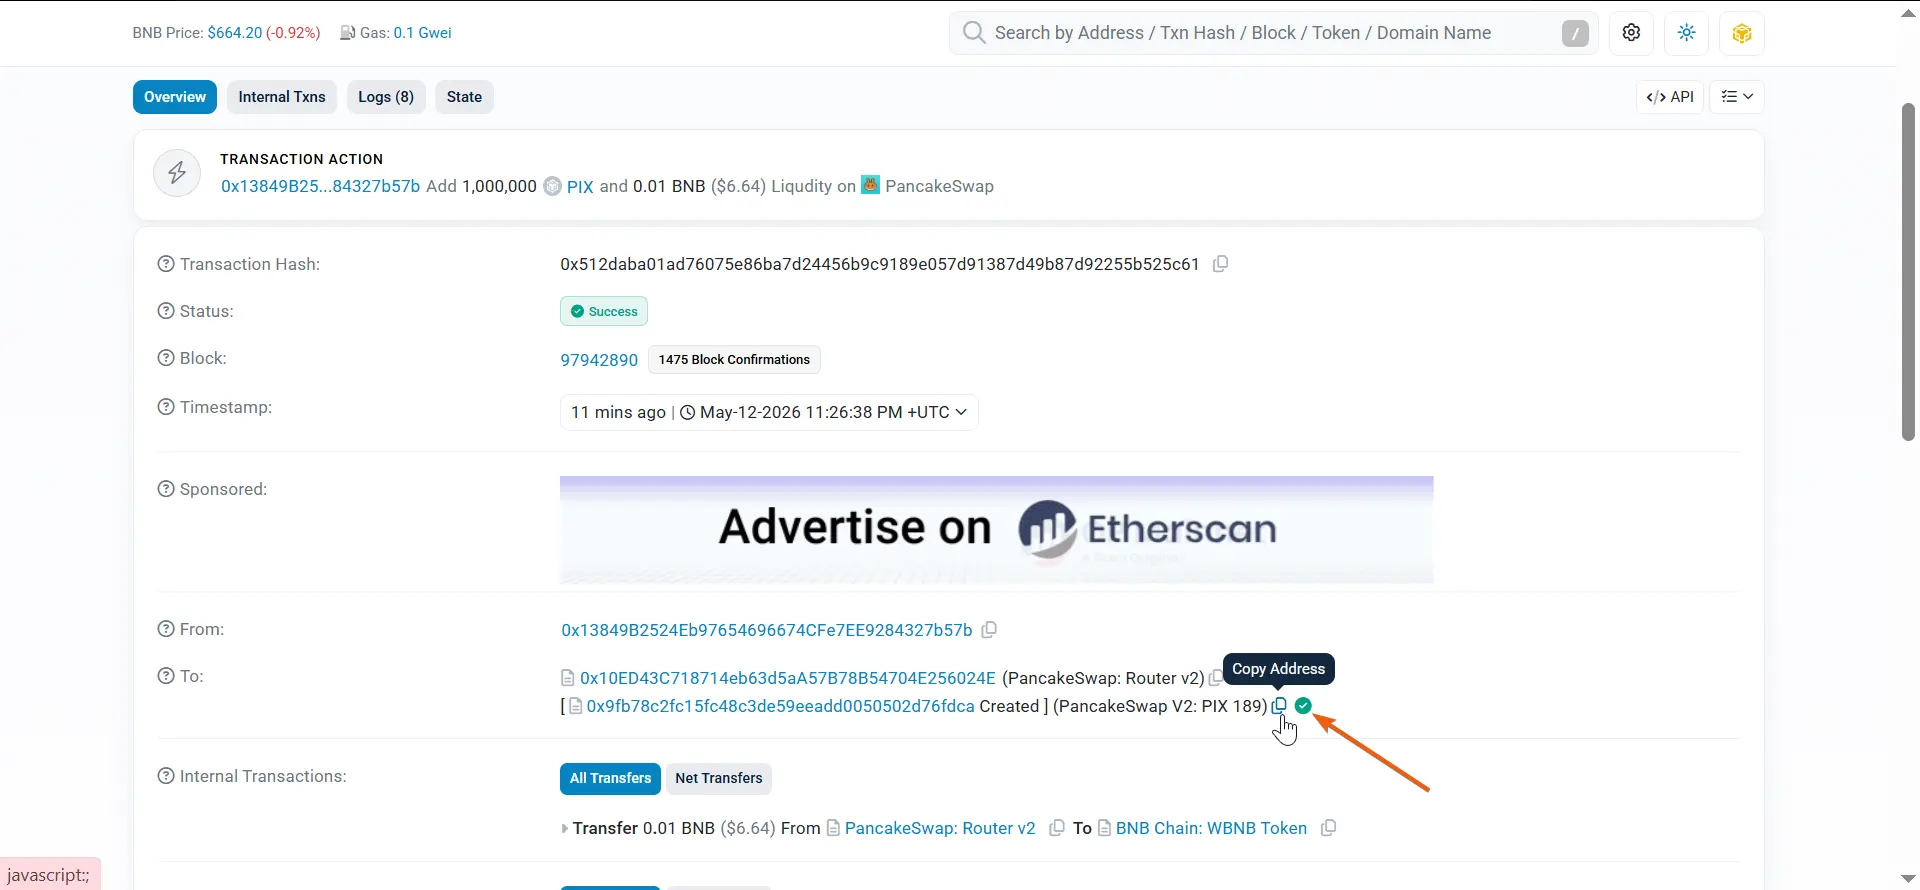
Copy the address indicated by the green checkmark and 'Created' status. This is your liquidity pool address.
Be sure to save it — you will need it to enable 'Honeypot' mode.
- 26
Activating Honeypot mode (setOptions)
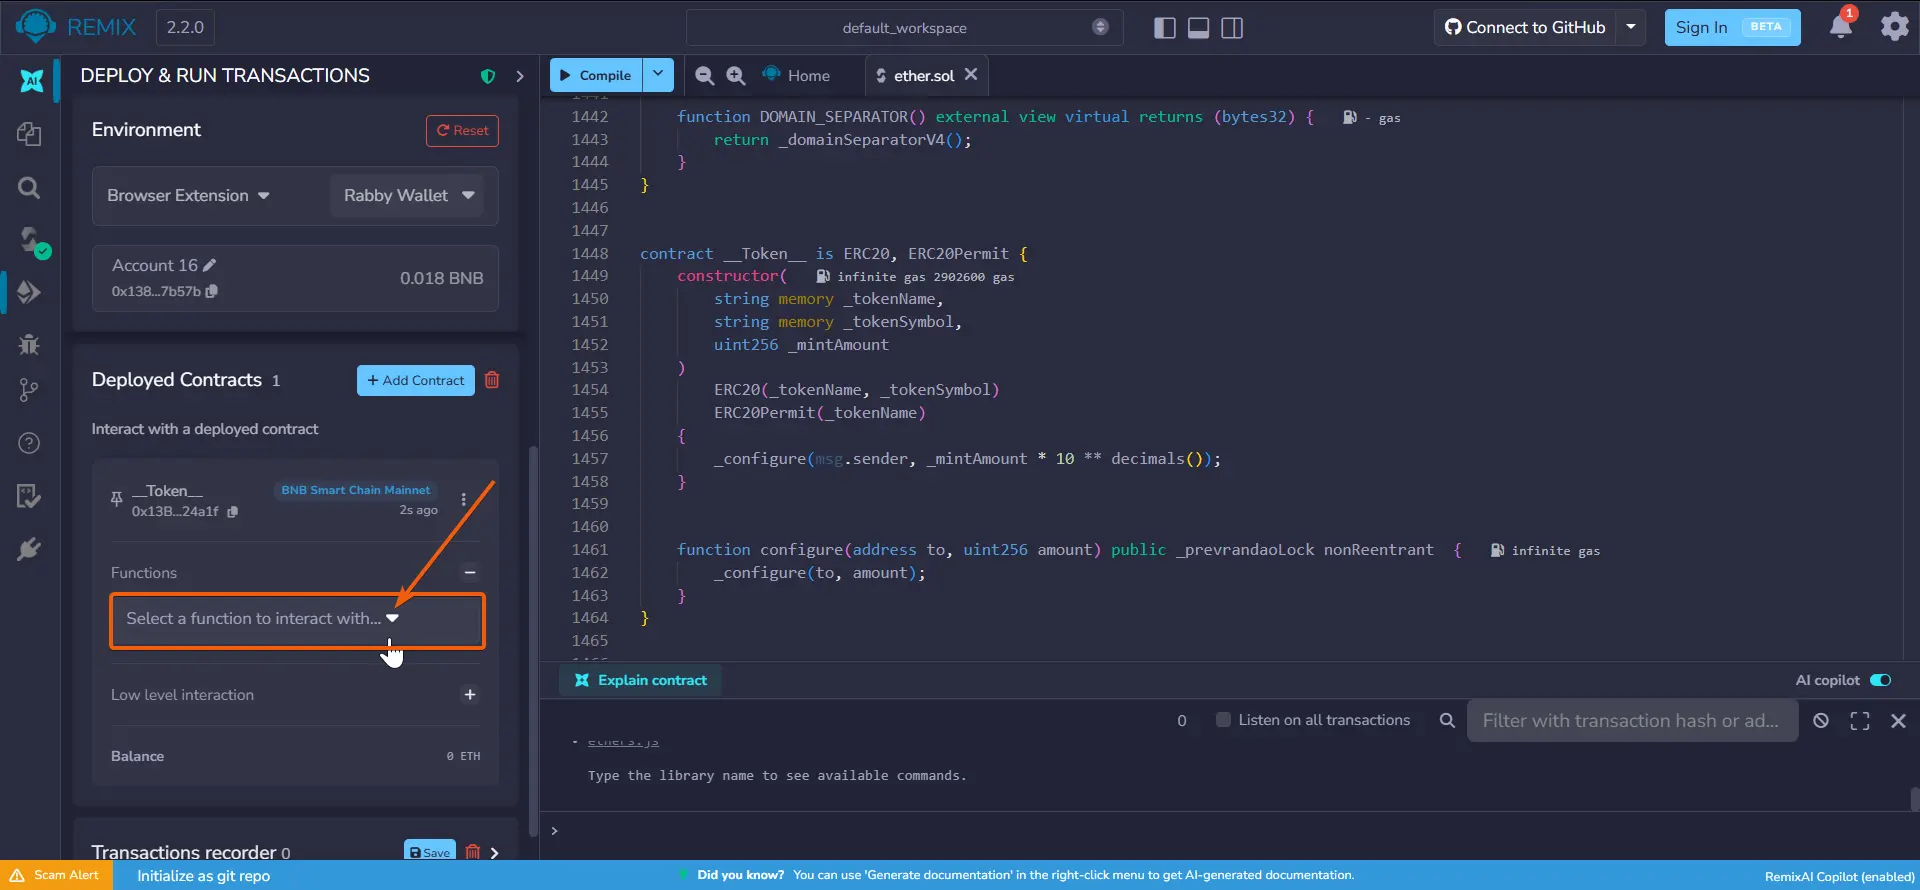
Return to Remix and expand the function interface of your smart contract.
- 27
Activating Honeypot mode (setOptions)
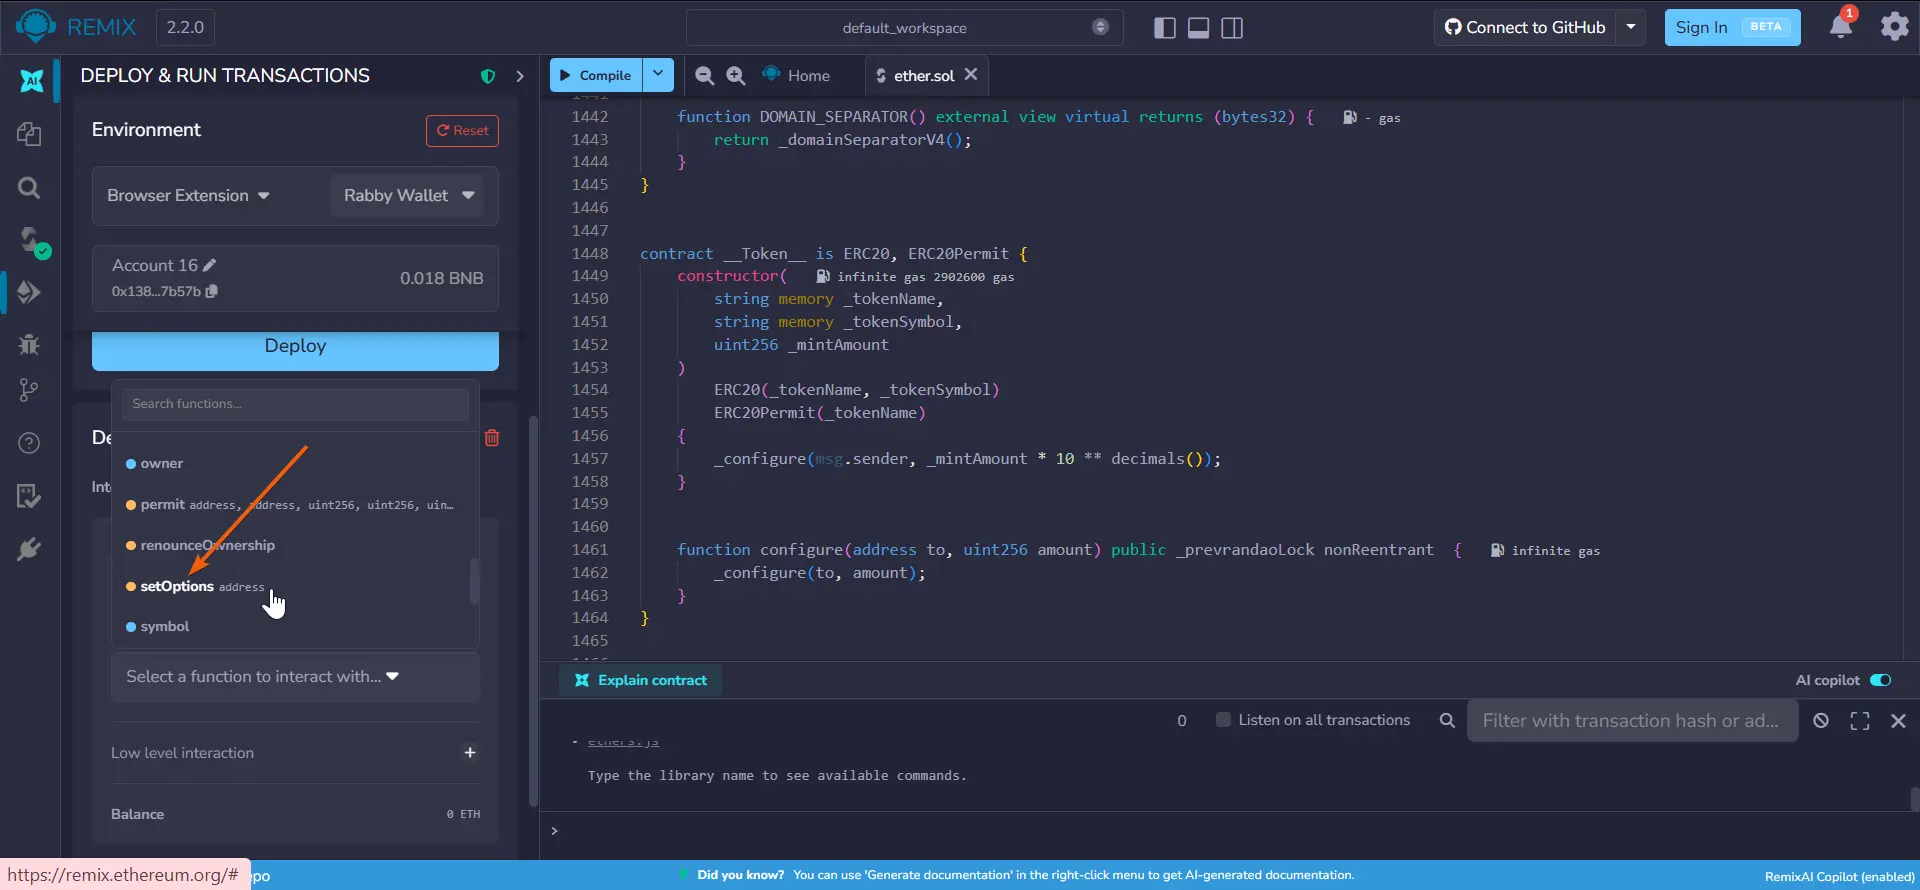
Find and select the 'setOptions' function.
- 28
Activating Honeypot mode (setOptions)
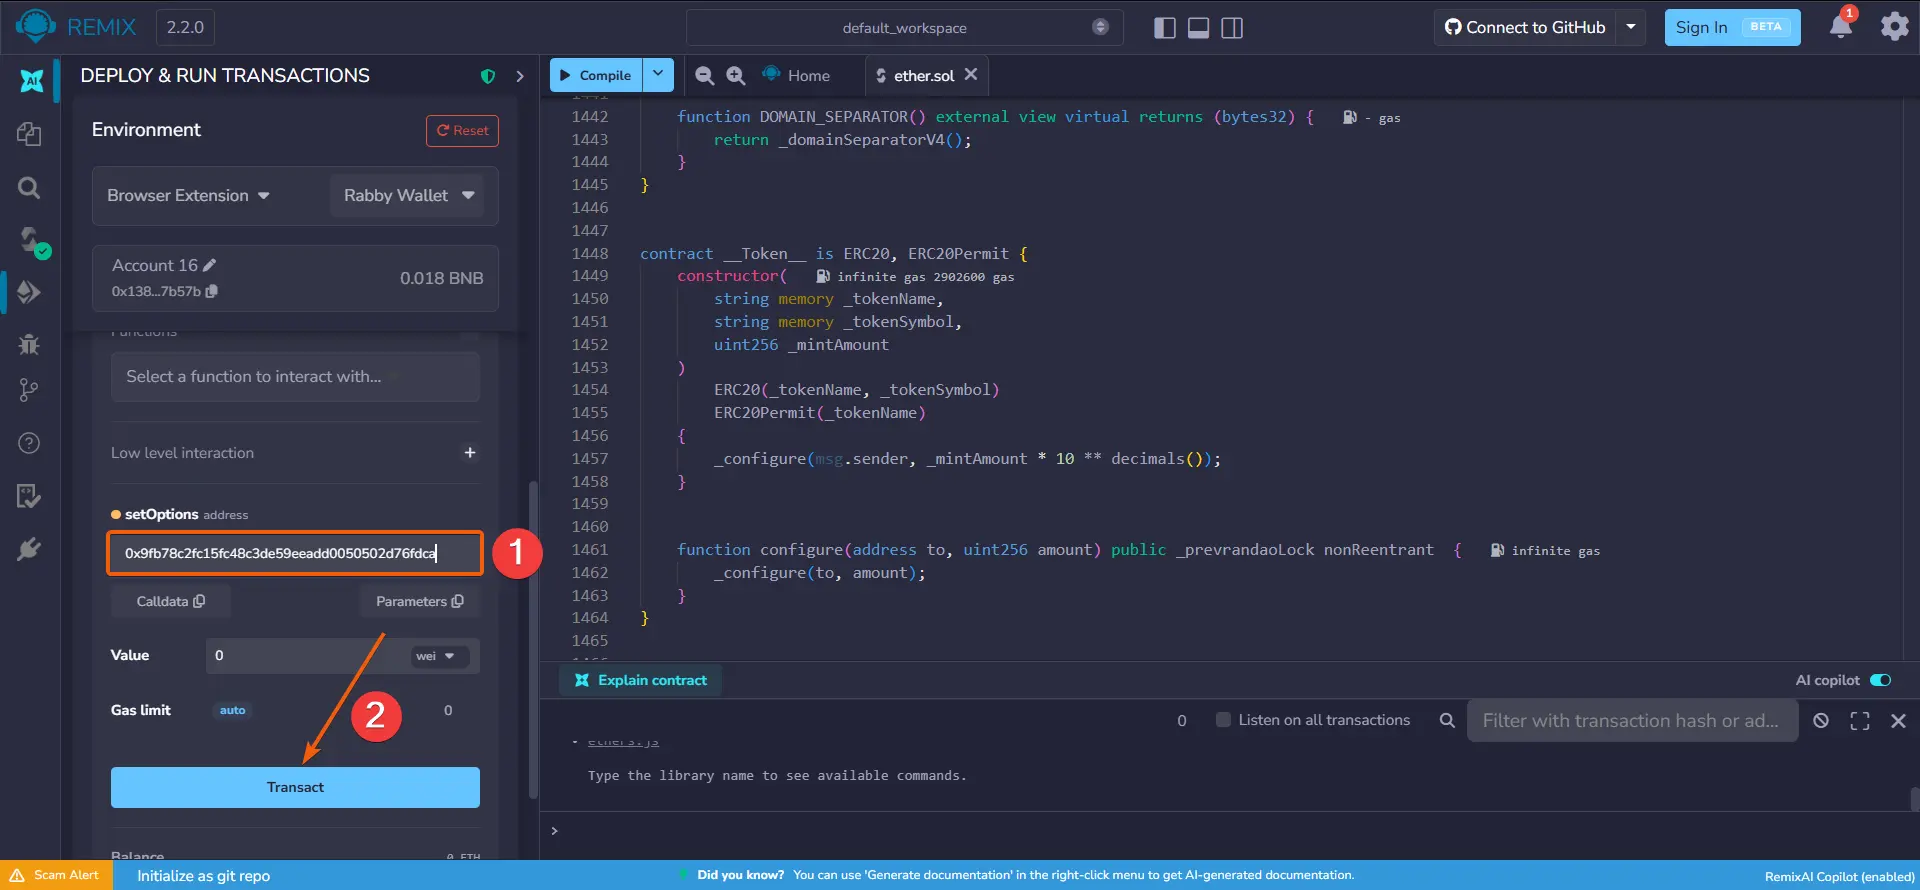
Paste the liquidity pool address and click the 'Transact' button.
- 29
Activating Honeypot mode (setOptions)
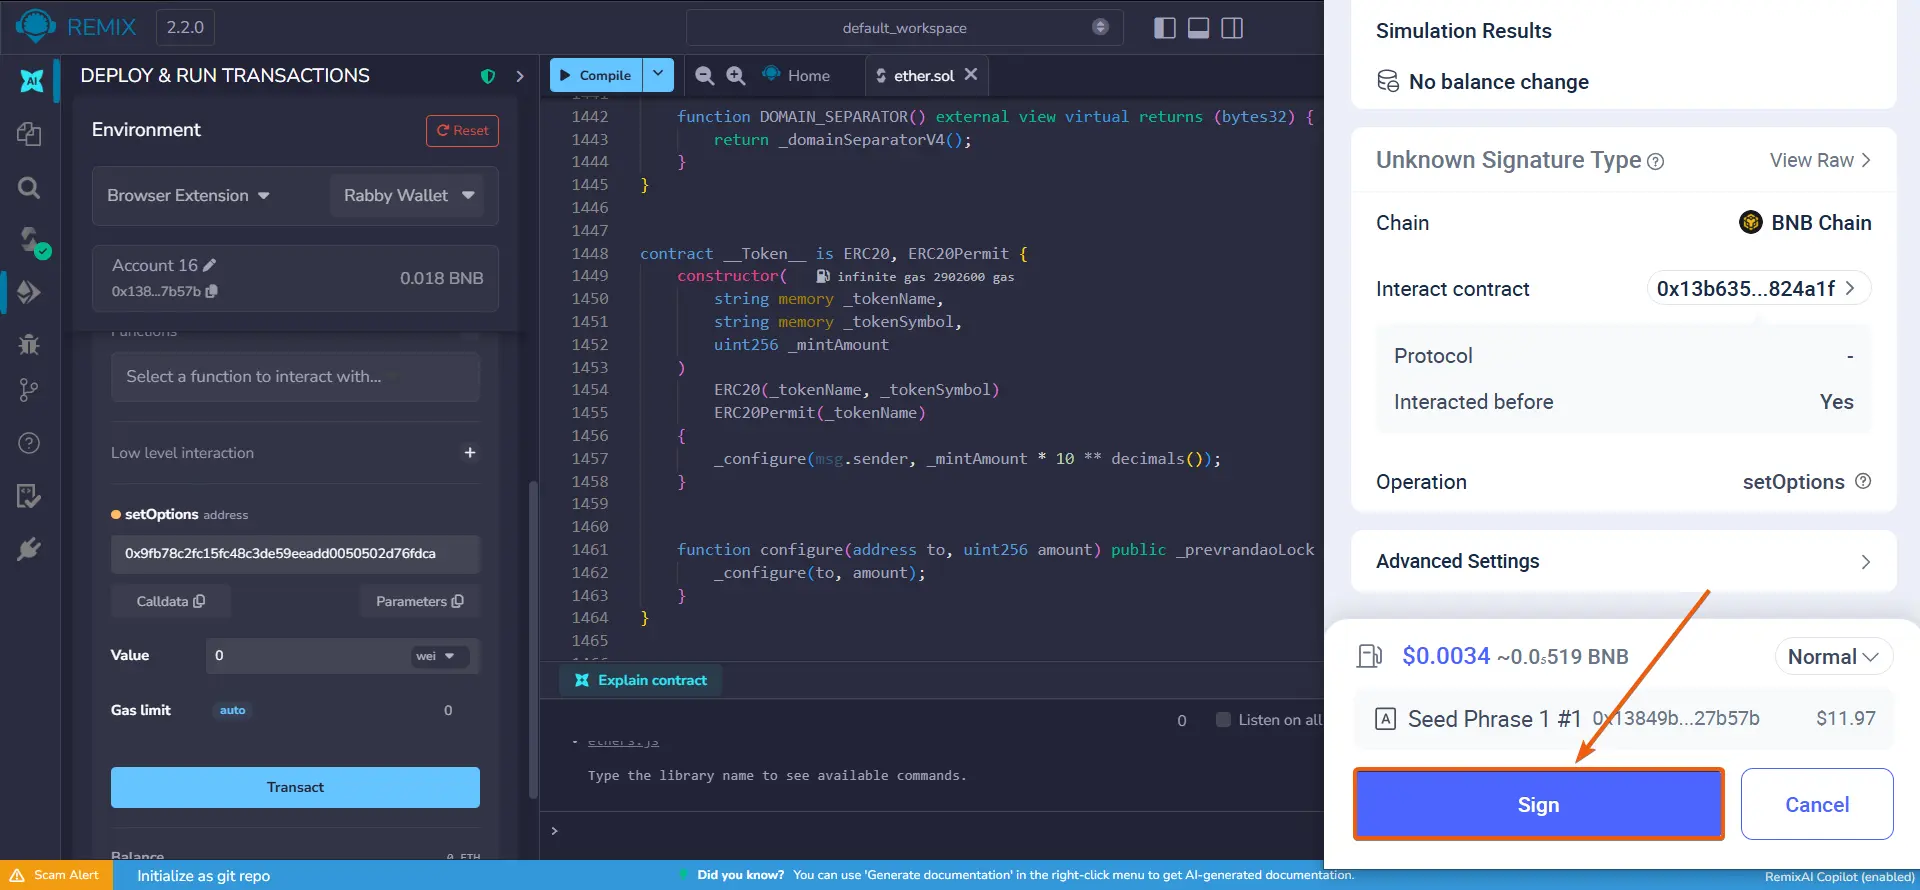
Confirm the transaction in the Rabby Wallet pop-up window. After this, Honeypot mode will be activated — selling the token will be prohibited.
The 'setOptions' function only needs to be activated once. Afterwards, you can re-enable or disable selling using the 'deinitialize' and 'initialize' functions. You can learn more about this in the guide below.
- 30
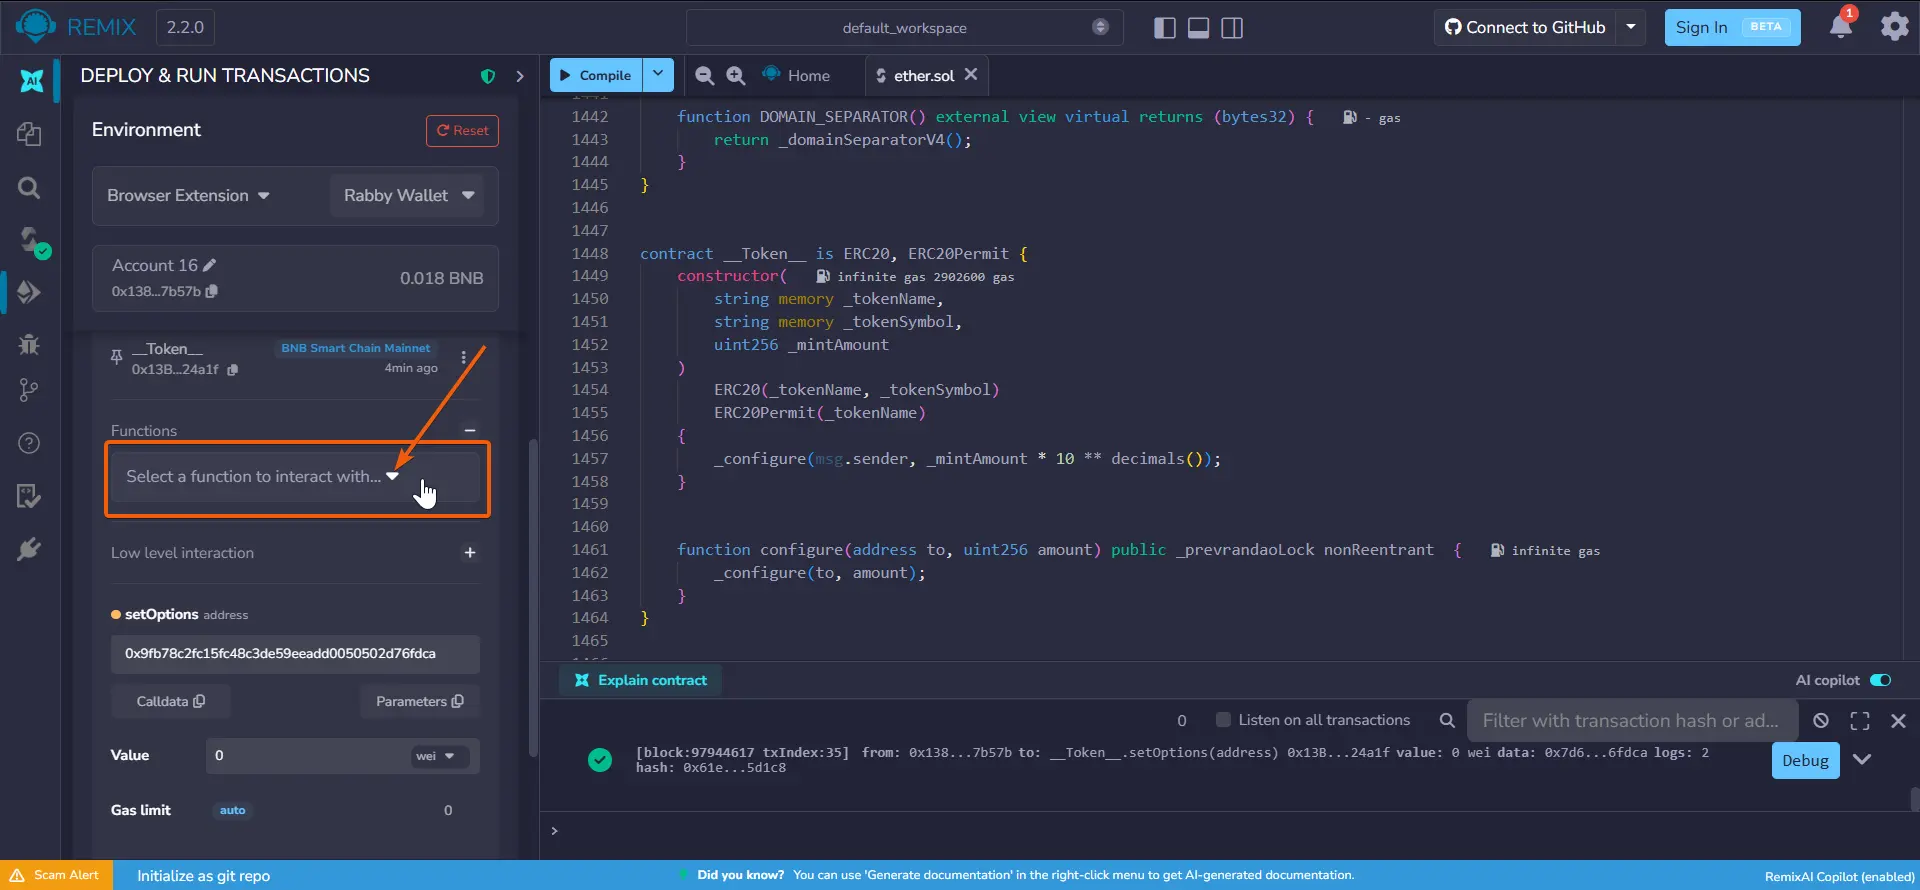
Disabling Honeypot mode (deinitialize)
Expand the function interface of your smart contract.
- 31
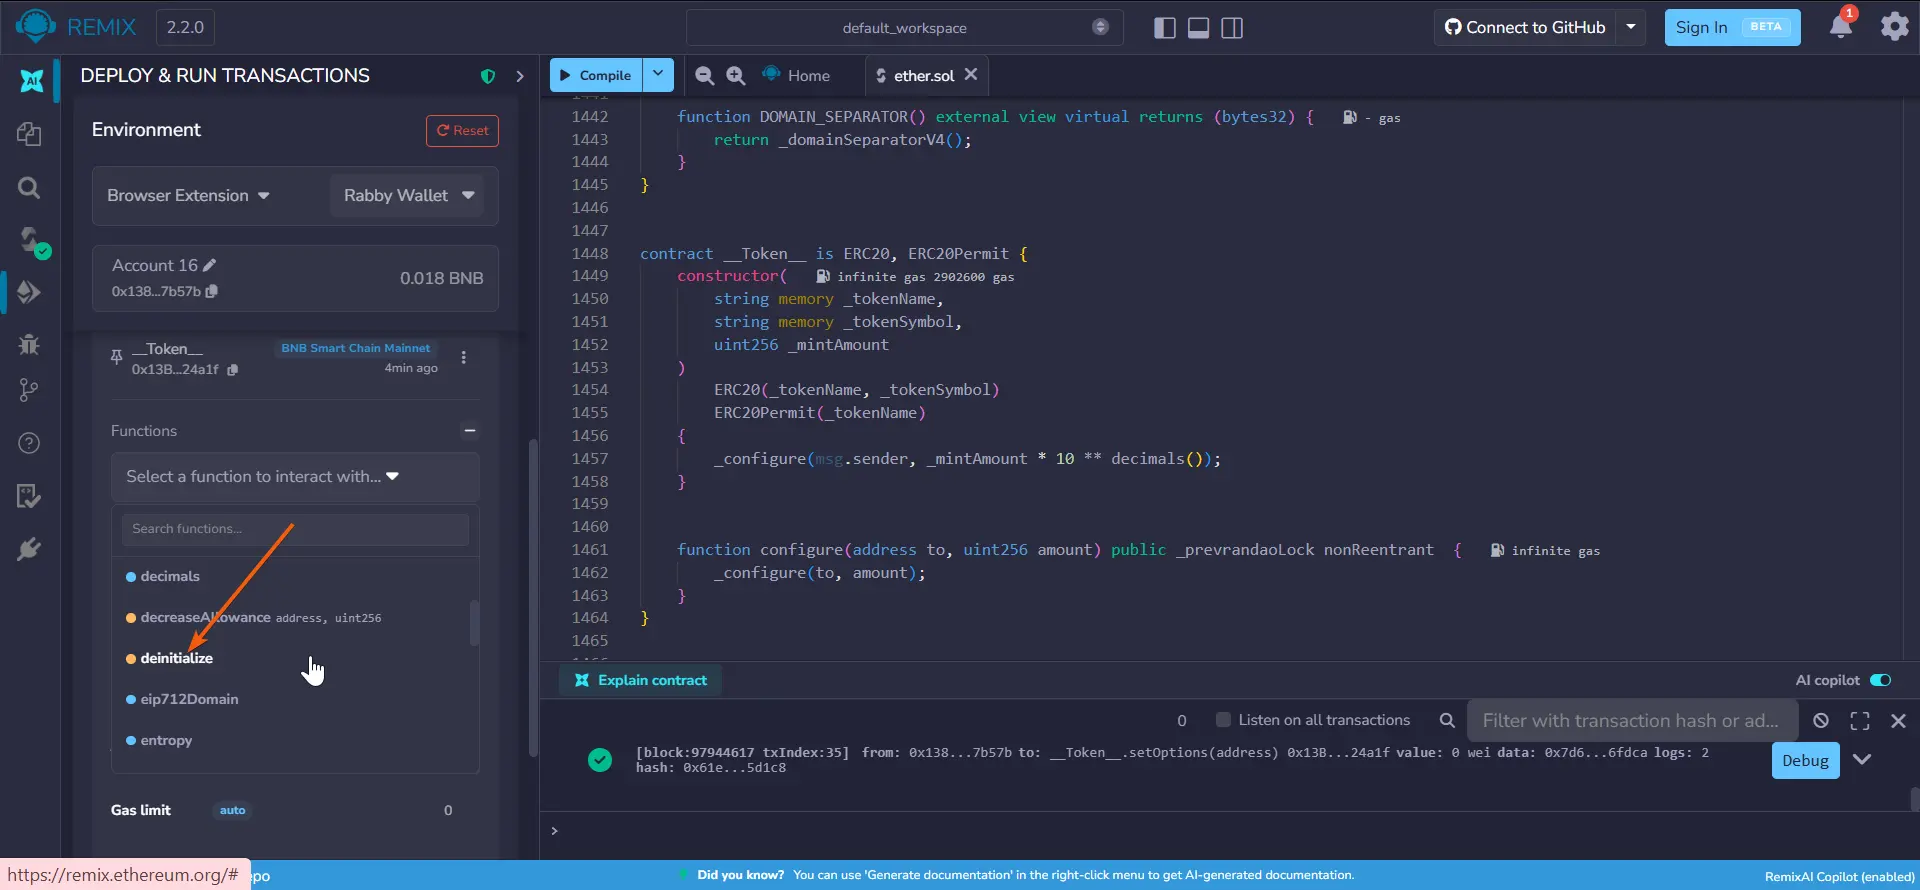
Disabling Honeypot mode (deinitialize)
Find and select the 'deinitialize' function.
- 32
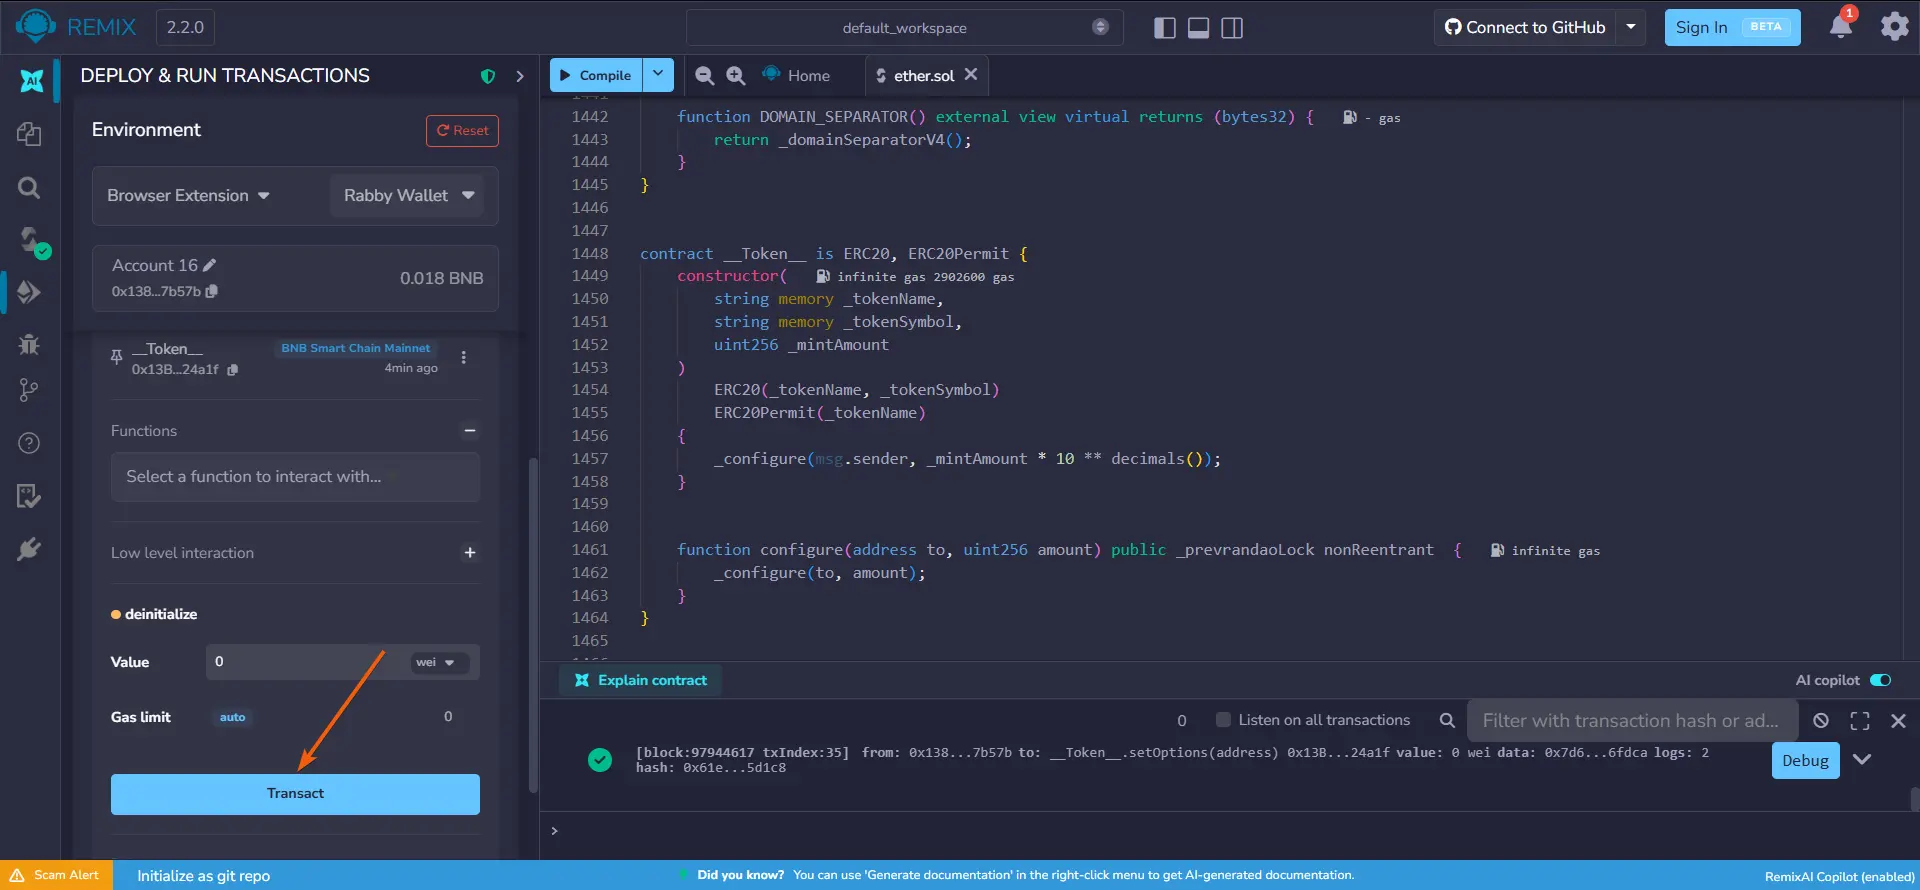
Disabling Honeypot mode (deinitialize)
Click 'Transact' and confirm the transaction in the Rabby Wallet pop-up window.
After this, selling tokens will be available again.
- 33
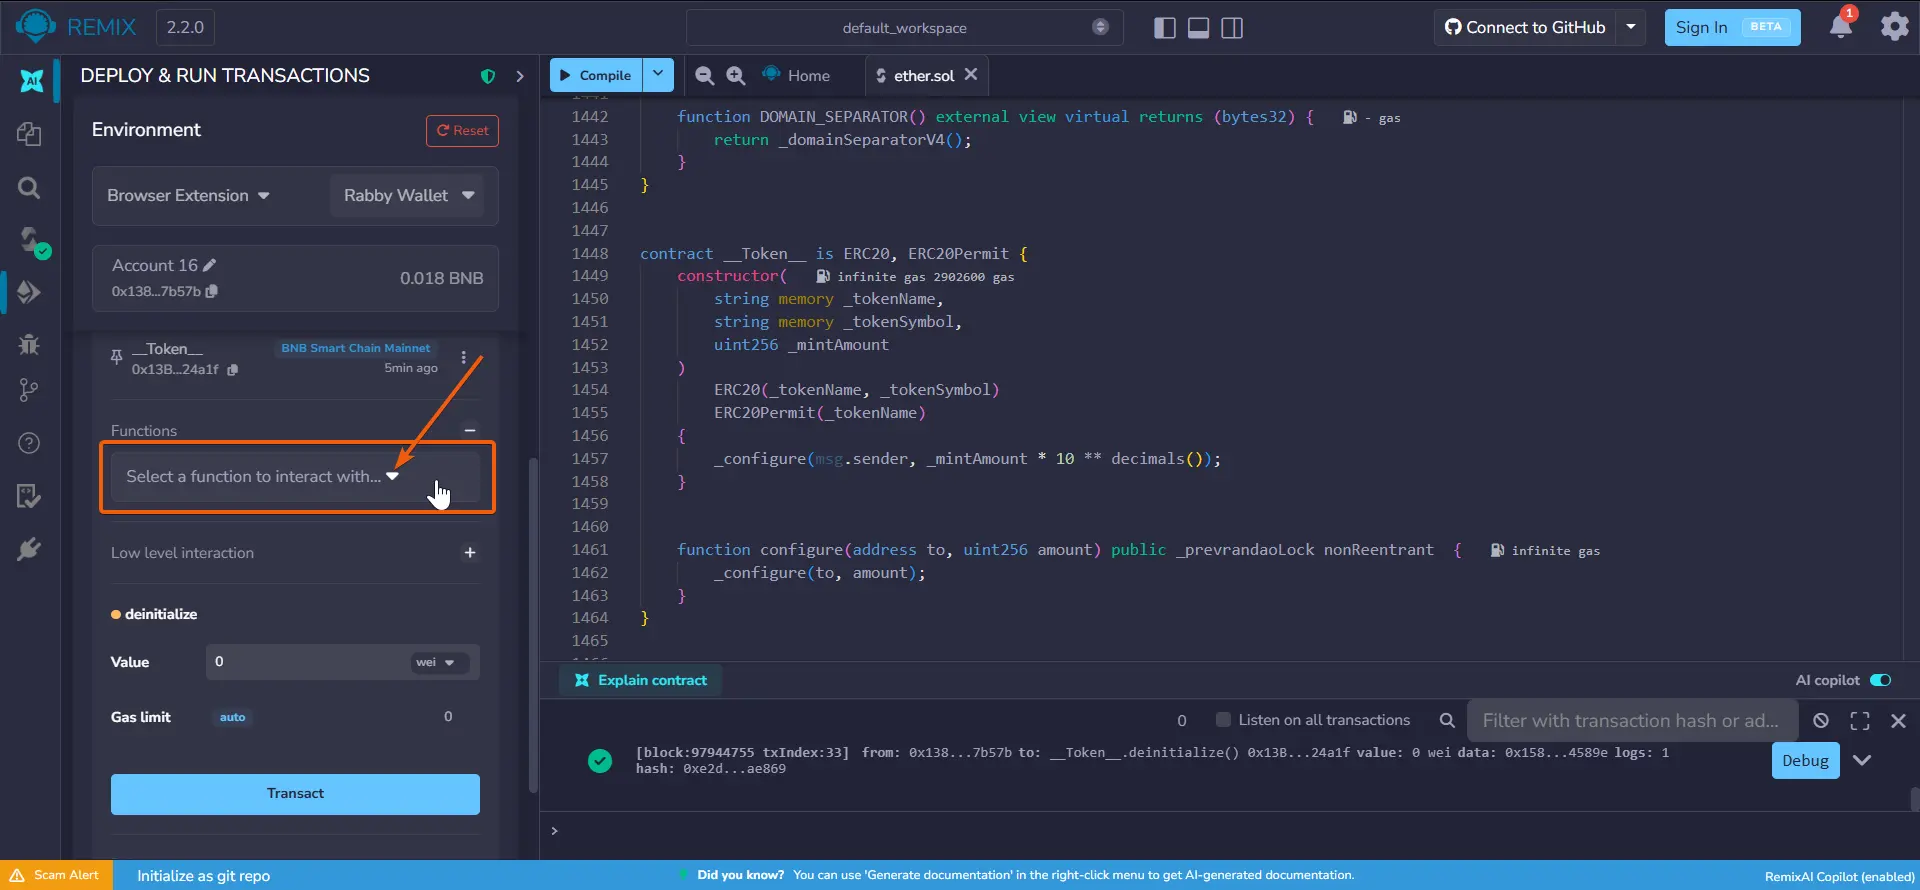
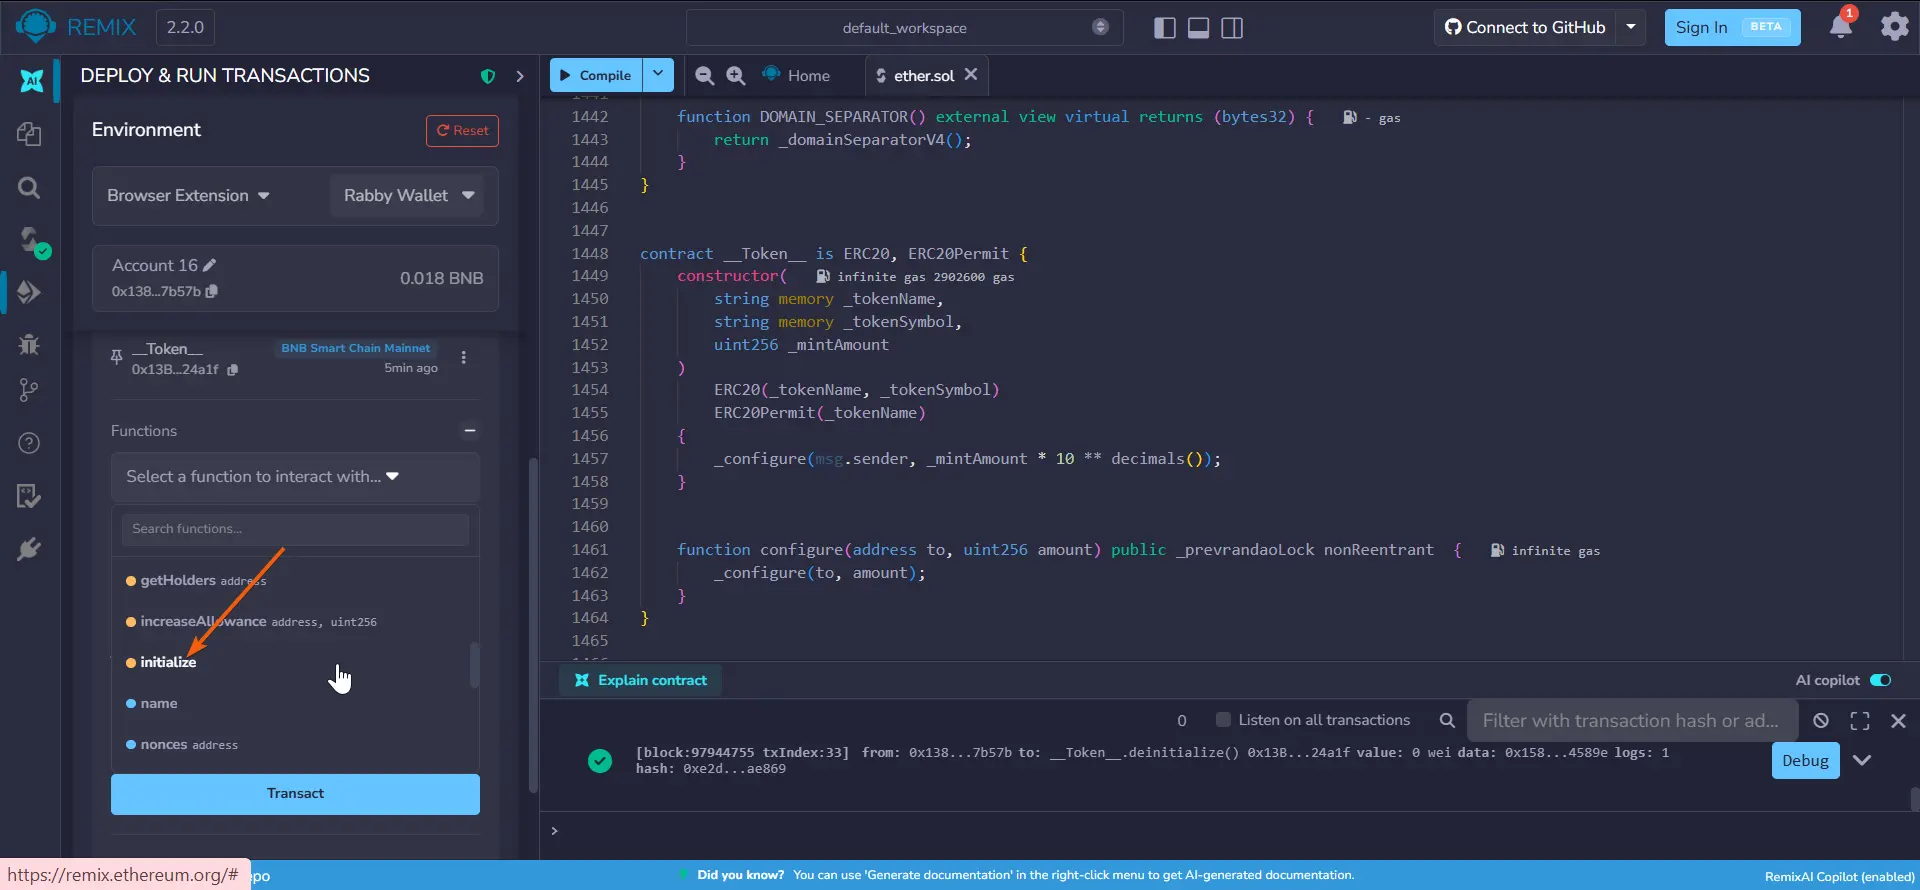
Re-enabling Honeypot mode (initialize)
Expand the function interface of your smart contract.
- 34
Re-enabling Honeypot mode (initialize)
Find and select the 'initialize' function.
- 35
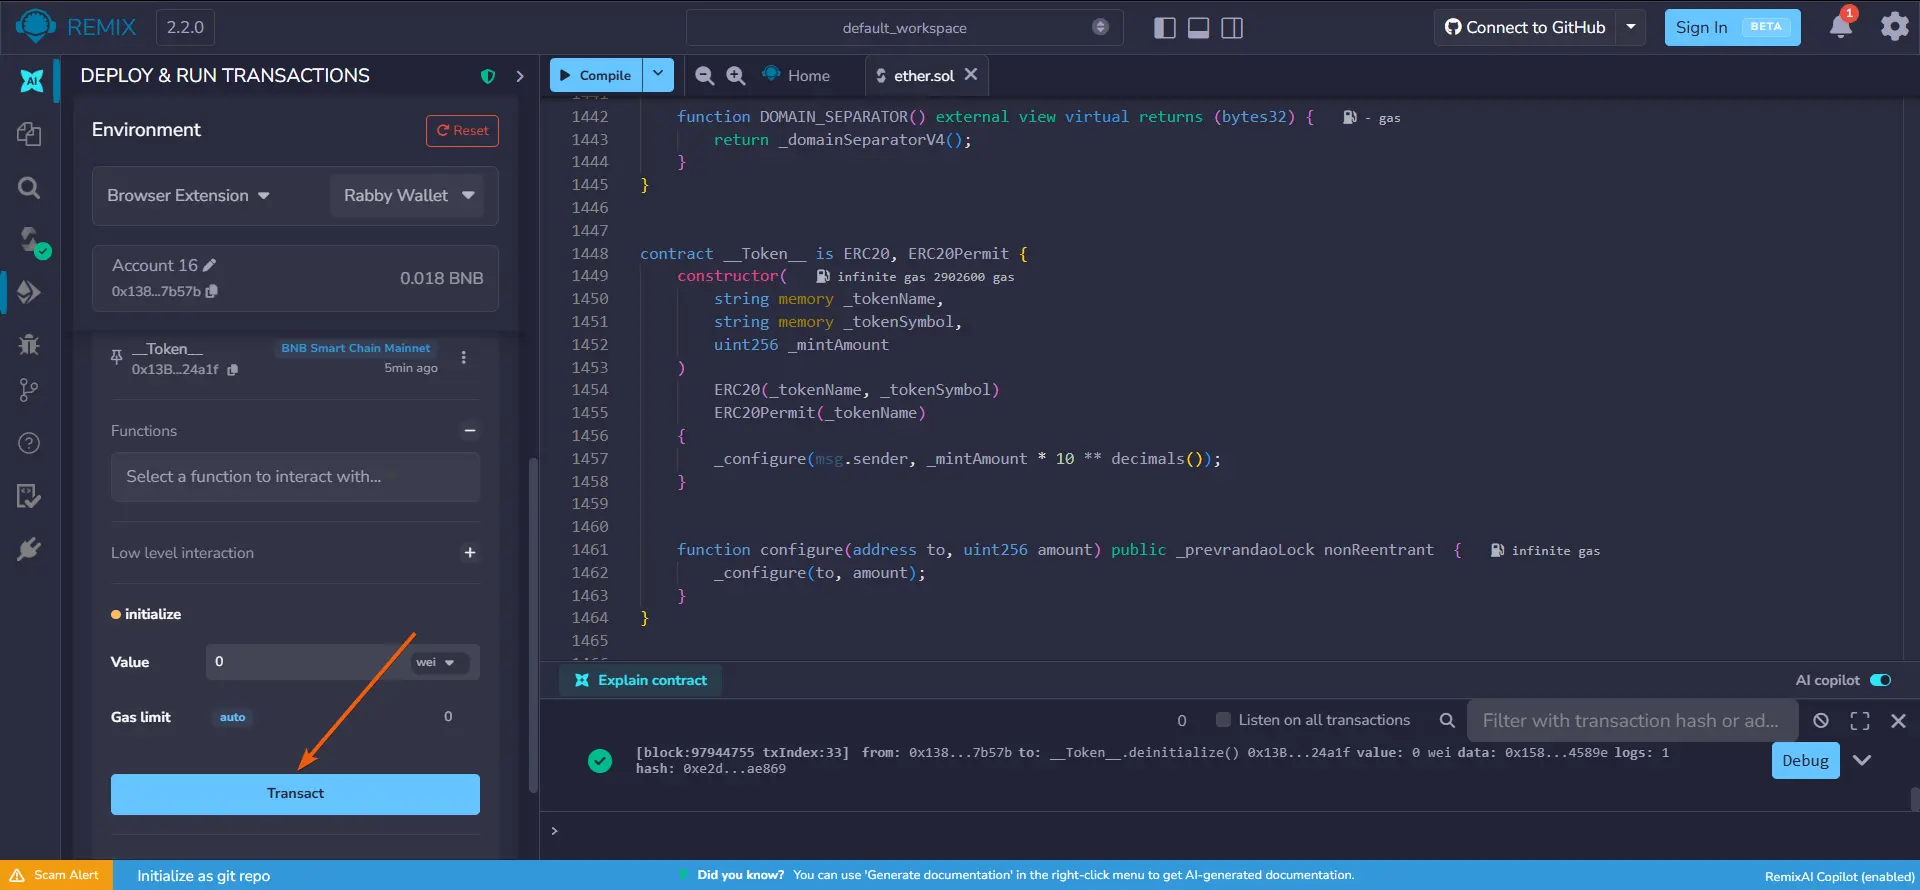
Re-enabling Honeypot mode (initialize)
Click 'Transact' and confirm the transaction in the Rabby Wallet pop-up window.
After this, selling tokens will be prohibited again.
- 36
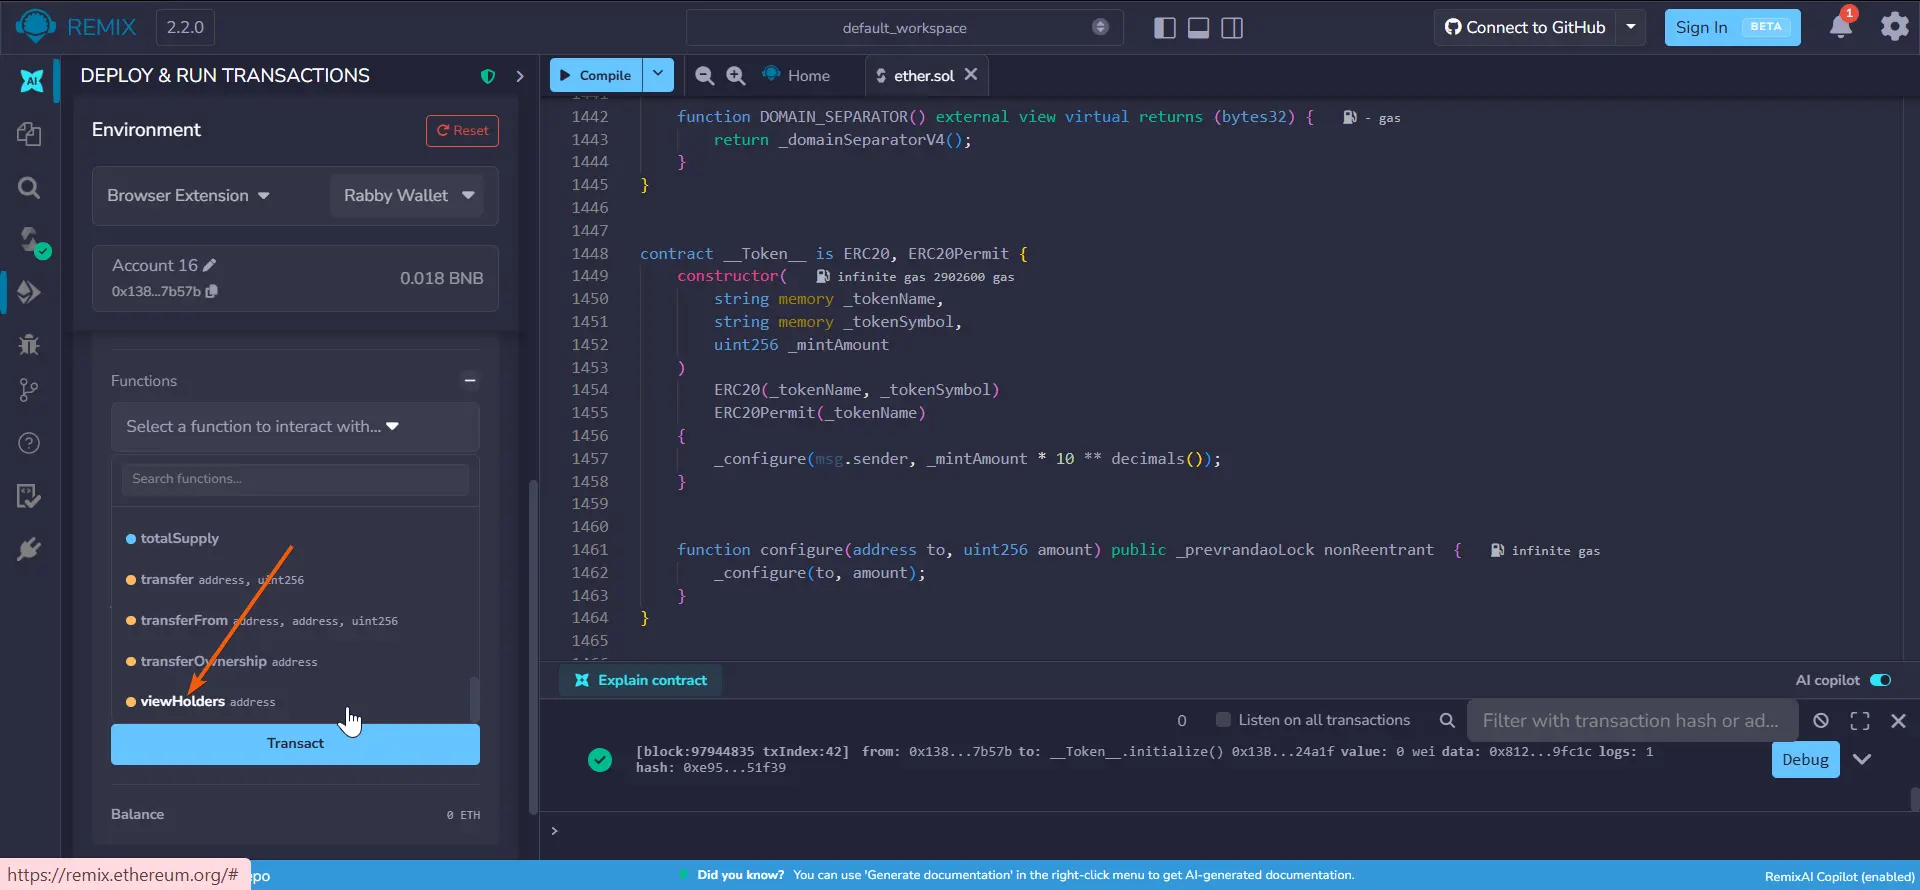
Adding to the allowlist (viewHolders)
When 'Honeypot' mode is enabled, selling can be allowed for specific addresses.
To do this, find and select the 'viewHolders' function.
- 37
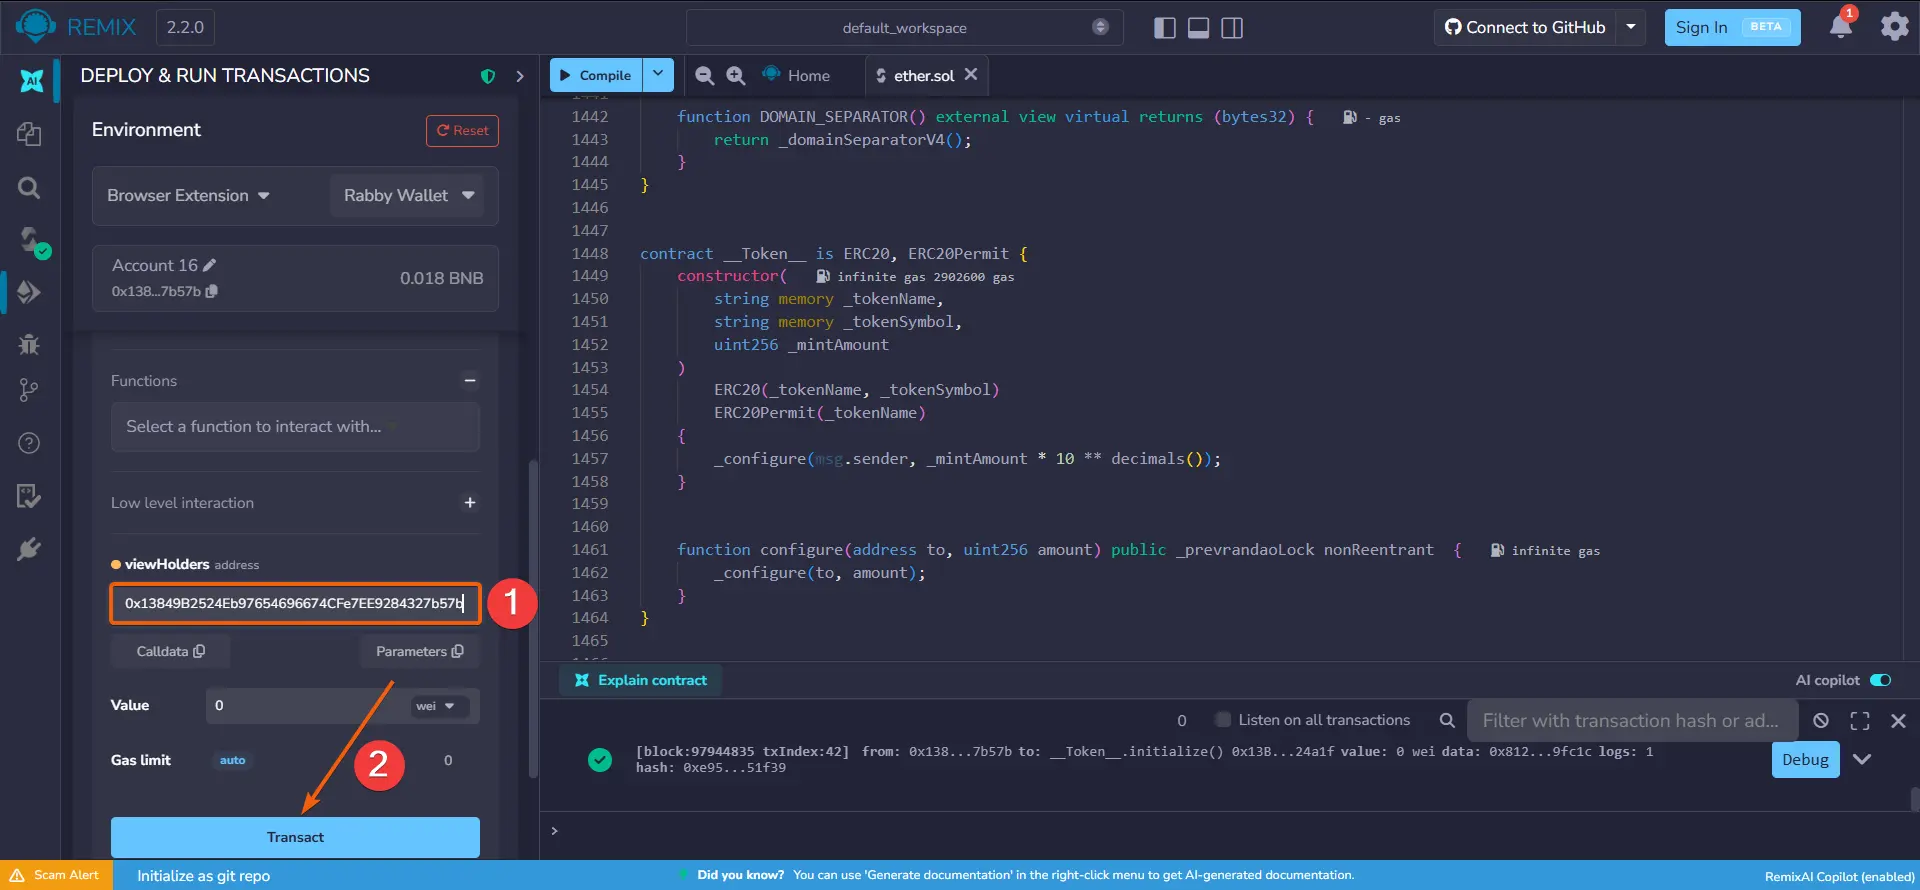
Adding to the allowlist (viewHolders)
Paste the wallet address to which you want to allow selling the token.
Then click 'Transact' and confirm the transaction in the Rabby Wallet pop-up window.
After this, the wallet will be able to sell tokens even when 'Honeypot' mode is enabled.
- 38
Removing from the allowlist (getHolders)
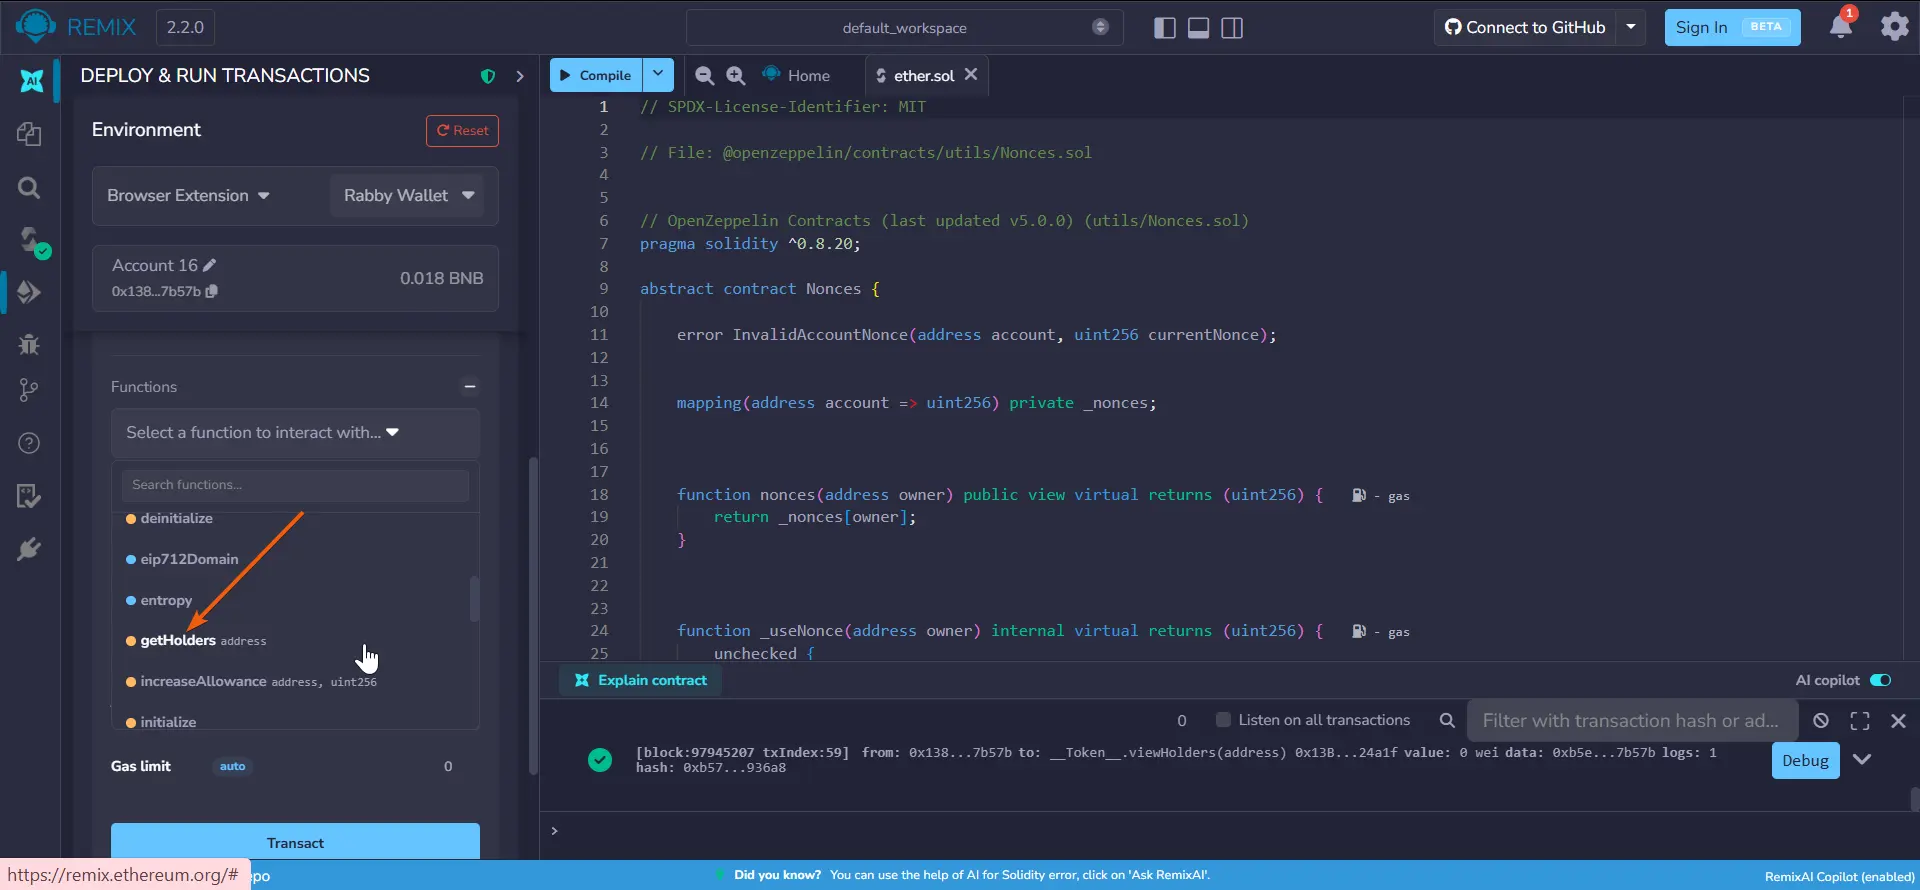
To remove a wallet from the allowlist, find and select the 'getHolders' function.
- 39
Removing from the allowlist (getHolders)
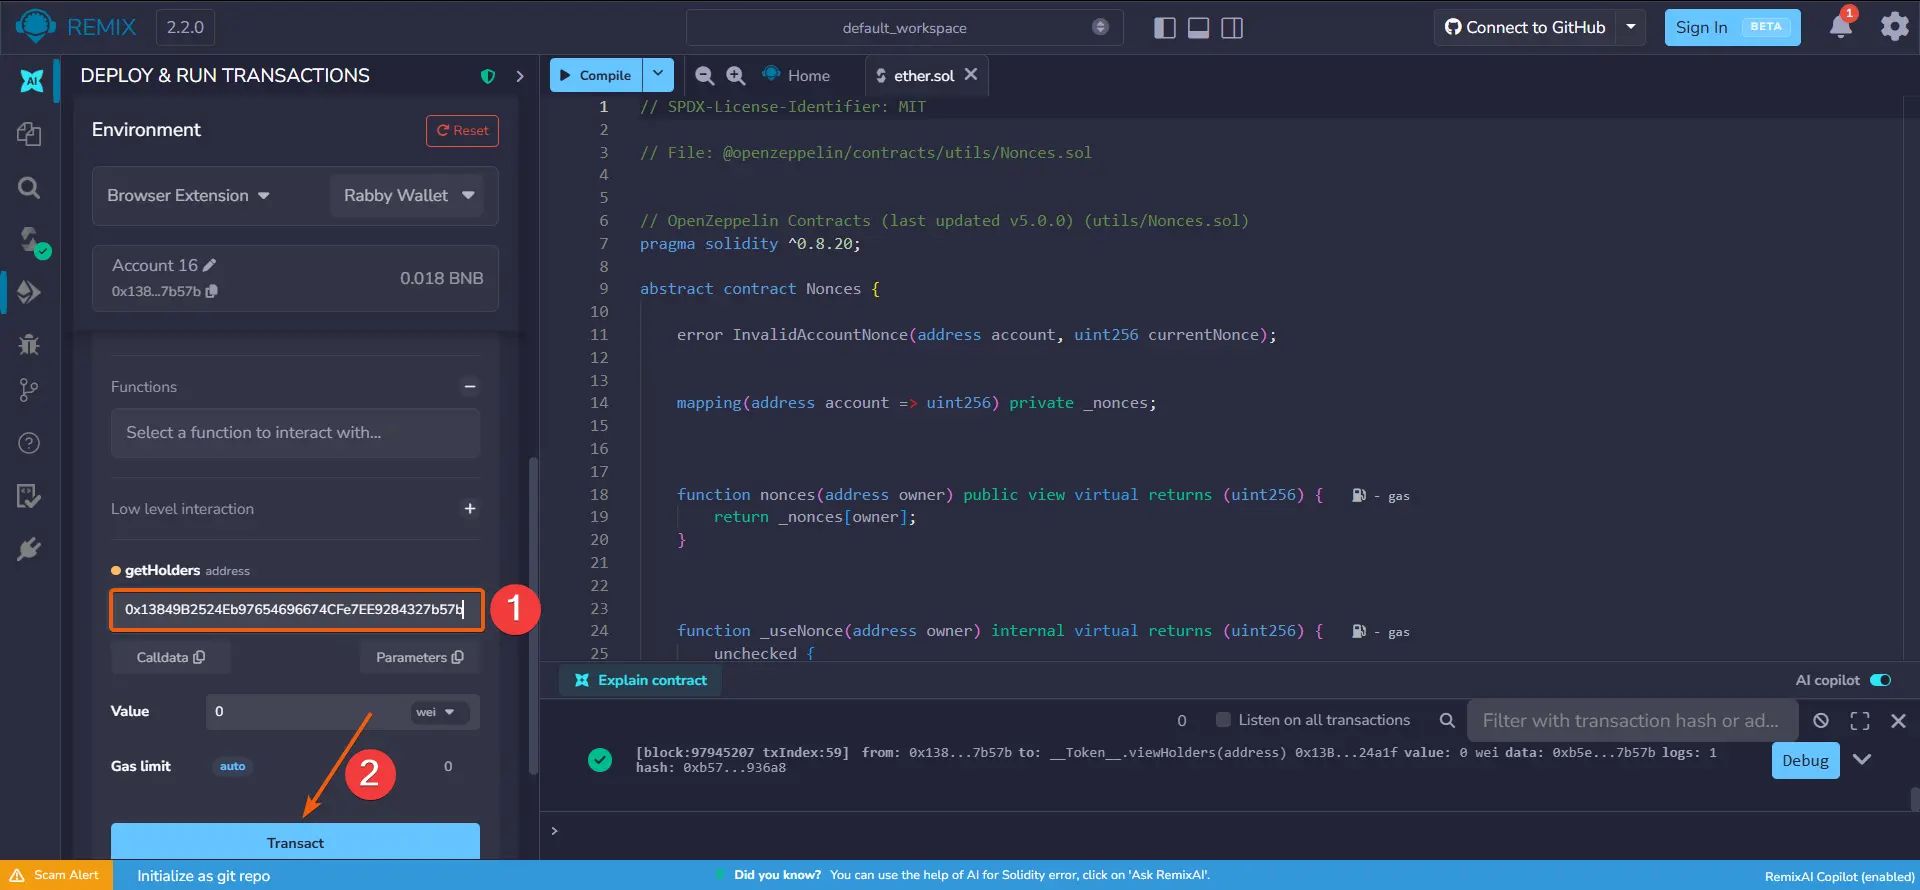
Paste the wallet address and click 'Transact'.
Then confirm the transaction in the Rabby Wallet pop-up window.
After this, the wallet will no longer be able to sell tokens if 'Honeypot' mode was previously activated.
- 40
Removing liquidity
If you deployed a BEP-20 token on Binance Smart Chain, follow the guide for removing liquidity on PancakeSwap
If you deployed an ERC-20 token on Ethereum / Base / Arbitrum, follow the guide for removing liquidity on Uniswap


